
Though it appears that paper marbling DIY videos are something of a current trend, paper marbling is an ancient art form that’s been around for centuries.
So, how has this practiced changed today? How can you marble paper yourself?

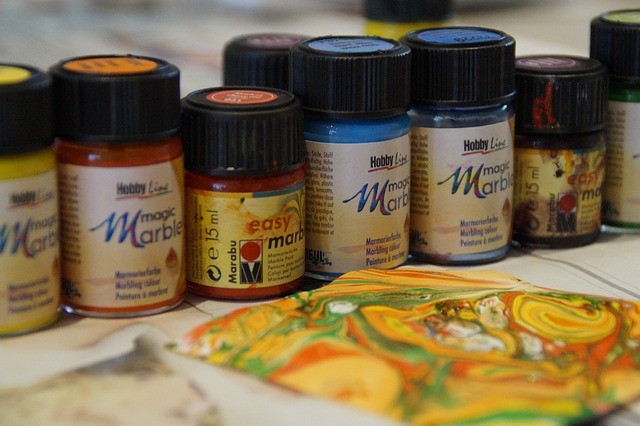
By Gabriela Ruellan (Creative Commons Attribution-Share Alike 3.0 licence)
Below we’ll give you all the juicy details, along with a step-by-step guide to trying this craft for yourself!
Contents
The Uses of Paper Marbling
The oldest known form of paper marbling, called suminagashi (which translates to “floating ink”), originated in Japan around the 10th century, though historians believe that it could be even older than that.
Back then, a tree-resin-based surfactant was dropped into a pan of water. Artists then used straws or other objects to manipulate the color placed on top, creating their designs before they transferred it to paper.
Paper marbling was used primarily to create important documents and even to prevent forgeries for hundreds of years. This is due to the fact that it’s impossible for two people to recreate the exact same, intricate design.
If you admire the beautiful, complex patterns of marbled surfaces, then you may appreciate learning how to marble paper on your own.
Anyone can learn to marble paper with just a few household products. It’s especially beneficial for kids, who can learn simple chemistry concepts while performing a fun craft project in one!
How to Marble Paper Yourself
To put it simply, water marbling is the process of floating layers of color on the surface of water, then applying something (in this case, paper) to absorb that color, along with its unique pattern.
Depending on what kind of paint you use, it may be necessary to add something to thicken the water. This is because some paints are too heavy and will sink to the bottom. Don’t worry, though, all of that will be addressed below.

By Zephyris (Creative Commons Attribution-Share Alike 3.0 licence)
Tools
The basic tools required to marble paper are super easy and affordable to obtain.
You’ll need:
- A shallow pan or baking dish (that’s larger than the paper you intend to use).
- Room-temperature water.
- Methyl cellulose (¼ cup for every 2 quarts of water).
- A pot.
- Acrylic paint in at least three different colors.
- Paintbrushes and/or wooden skewers.
- White paper.
- A whisk.
Directions
Thicken Your Water
- To start, fill your pot with water. Water from the faucet will work best, as water that has been chilled or warmed will affect how it interacts with the color, as well as how the design adheres to the paper.
- Next, you should add your methyl cellulose, a common thickening agent, to the water. You should include this step even if your paint isn’t heavier, as it’s always wise to err on the side of caution.
- You’ll see that the cellulose is in powder form, so you’ll need to whisk it every 10 minutes until an hour has passed. After the hour has passed, you can now add your thickened water to a shallow pan or dish.
Apply Color
- Now that you have your pan set up, it’s time to add your paint. For this example, acrylic paint is listed, though you can use any kind of paint you see fit, such as watercolor or even finger paint. Nail polish is also acceptable.
- You will need at least three colors to create your marble effect. Start by dipping two paint brushes into two different paint colors, then lightly dipping them into the water until the color has been deposited on the surface, alternating between the two. You will notice that the color disperses rapidly from the point of submersion, so subsequent layers should be placed in the same spot. This will contribute to the marbling effect. You should continue to alternate between your two colors until you see duel-colored rings in the water.
- Next, it’s time to either get a new, clean paintbrush (or rinse off one of the others) then dip this into your third chosen color. Pick a new area in the pan, adjacent to your original design, and start your new color rings. Here, you should alternate between the third color and one of your original colors.
Create Your Marble Design
- This is the fun part! Now that you have your color beautifully layered on top of the water, it’s time to manipulate it into your marble pattern. Take the back end of your paintbrush, or even a wooden skewer, and slowly start to swirl the colors together. You should take your time with this step, as it will be nearly impossible to fix your pattern if you make a mistake. Don’t be afraid to play around with different techniques, however.
- After some creative work, you should start to see your marble pattern take shape and, if everything goes smoothly, you’ll end up with a beautiful marble design.
Prepare Your Paper
- Now that you’ve laid the foundation and created your design, it’s time to transfer it to your paper, which is definitely the easiest step. Simply grab your piece of paper by the two opposing corners, then lay it gently into the pan of water. Allow it to lie there for 20 seconds, then lift it out, allowing the excess paint and water to drip away.
- Next, you should hang it on a clothesline to dry for at least two hours. After that, check it to make sure it’s fully dry. If it’s not, let it hang until it is. Then you’re done!
Here’s a video showing an example of how to make marble paper.
Final Thoughts
Now that you’ve learned to marble paper, you might be wondering just what to do with your colorful creation.
Good news? Marbled paper is interesting enough to use as a standalone piece of artwork. You can totally display your marbled paper in a frame and be done with it.
If you want to go the extra mile, you can also use your marbled paper as the foundation for a slew of other projects like diary covers, homemade stationary backgrounds, die-cut letters, and so on.


