
Pumpkin carving is a tradition that both adults and kids can be a part of. They’re great for bringing the family together, and the result is fun, spooky décor!
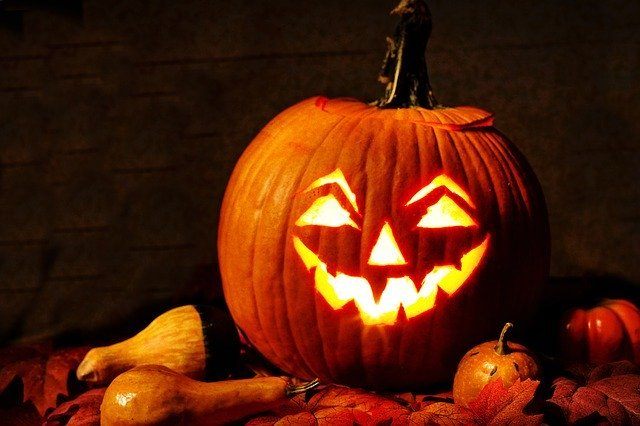
The tried and true jack-o-lantern style is beloved, but that can get boring fast. Thankfully, there are many ways you can use a pumpkin to decorate your porch and have the most eye-catching display in your neighborhood!
Of course, creative pumpkin carvings are more than just intricate designs. Sometimes you don’t even have to carve your pumpkin at all.
Where do you start, and what do you need? Let’s dive into all that and more down below.
Contents
What You Need for Pumpkin Carving
No matter the style of carving you prefer, the right equipment is vital. All in all, two main tools should be on hand: something to cut out big shapes and something to cut out small details.
Of course, if you want to create more intricate displays, there are even more specialized tools to ensure your success. Here’s what you need when carving out a pumpkin, no matter your design.
For Simple Cuts
Even complex designs will have large spaces that need clearing. Hence the basic, simple-cut tools!
For those who would like to have their kitchen items serve a double purpose, a great tool to use is a serrated knife – preferably a utility knife. As a bonus, you probably have one lying around already. If you don’t own a serrated knife, it’s a good investment to consider. You can also use this knife for the rest of the year by cutting tomatoes, slicing crusty bread, and much more.
For those who would like to use something more heavy-duty, try the keyhole saw. A keyhole saw is often the size of a chef’s knife. Its blade tapers to a narrow tip, making it perfect for carving small shapes.
For Small Details
The usual jack-o-lantern face is a hugely popular design. However, for some cool pumpkin carvings, throw in intricate lines and fine details!
To get those small details, use a paring knife. Perfect for peeling and chopping small veggies and fruits, this knife is also great for creating teensy details in a pumpkin. As a bonus, you probably have one lying around in your kitchen already. Much like a serrated knife, it’s also a great investment that you can use year-round in your meal prep.

For Shaving Designs
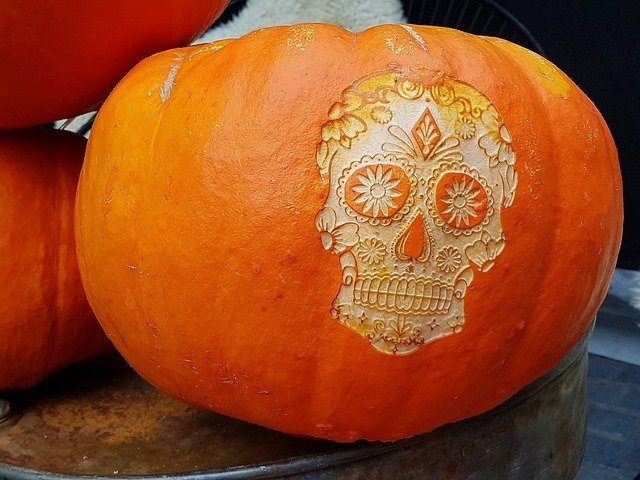
To break out of the pumpkin carving mold, why not shave your pumpkin instead of carving it? Shaving a pumpkin creates a unique pattern, since only partially removing the pumpkin’s skin creates a softer glow from the candle inside. The rough, imperfect textures can also create interesting patterns for the light to follow while shining out, too.
Shaving a pumpkin means that you remove the pumpkin’s surface partway, just before it pokes a hole through the pumpkin. It’s considerably more delicate than most carving methods, and you’ll need the perfect tool for the job. Enter chiseling tools. Chiseling tools are commonly used for woodworking, but they’re perfect for your pumpkin carving needs.
To shave circles in particular, switch out your chiseling tools for a melon baller.
For Mapping Out Designs
If you want to go for a more ambitious design, chances are, you’ll need to map out your designs first. For a more professional approach, you can use a pin or needle tool. This tool has a pin-prick point that you can use to create small holes in your pumpkin, creating a map for your designs.
For those who would rather not buy a whole new tool, you can use a pencil or a pen. While it does leave marks on your pumpkin, it’s often unnoticeable from far away. You can also mark your pumpkin lightly, so the spots left behind can be wiped away later.
If you do go with the pen or pencil route, make sure to clean your pumpkin’s surface first by wiping it with rubbing alcohol or soap. This will remove oils from the surface of the pumpkin, allowing the pencil lead or ink to stick better.
Pumpkin Carving Sets
For those who like to have tools with a dedicated use, there are many pumpkin carving sets that you can buy. While a great number will be unreliable and flimsy, these sets curated by Wired are a great choice for those who love pumpkin carving.
These are sets for everyone, from those who need to scoop out a lot of pumpkin guts to those who would like to carve pumpkins impressive enough to win a prize.
Pumpkin Carving Tips
Pumpkin carving should be fun. Of course, it’s also a lot of work. To keep your pumpkin carving tradition fun and easy, here are some tips to keep in mind.
Get a Pumpkin with a Thick Stem
When choosing your pumpkin, you may be tempted to pick out ones without a stem. After all, you’ll be cutting it out, right? However, it’s better to do the exact opposite: choose a pumpkin with the thickest, greenest stem.
Since pumpkins get nutrients from their stems, a bigger stem often means thicker pumpkin walls, which means that your pumpkin is more likely to survive for longer. Greener stems also mean that your pumpkins are fresher, and less likely to dry out immediately.
Finally, a pumpkin with a stem means that it hasn’t been handled too much, making it less prone to bumps and spots.
Carve Out the Back
On that note, don’t cut out the stem at all. Since it’s where pumpkins get their nutrients, it would be akin to cutting out the roots of a plant, and we’d rather keep our pumpkins looking as fresh as they can.
You may also have come across tips that say that you should cut from the bottom instead. While much better than cutting the top, this will make all the moisture drip downwards, creating a mess on whatever surface your pumpkin is resting on.
So, where are you supposed to cut out your pumpkin? The back, if possible. Chances are, you won’t have an intricate design on the entire surface of your pumpkin, so it’s best to cut out the back.
Scoop Up All the Insides
Other than cutting from the back, in order to preserve your pumpkin, it’s wise to ensure that all the insides are scooped out. Moisture on the inside of your pumpkin will make it rot and decay faster.
To avoid this, don’t get fainthearted and leave the guts lying inside. You won’t be able to see it, yes, so it may not impact your design immediately. However, if you scoop up the insides – getting as close to the skin as possible – you’ll have a great, long-term design. As a bonus, a thicker pumpkin wall means you’ll have a more difficult time piercing through it.
Once You Start Carving, Don’t Stop
Keep on trucking! Or, at least, don’t start carving your pumpkin way too early in the month and stop midway for a week.
Pumpkins are hardy veggies and will last for a great deal of time – that is, until they’re carved. As soon as you cut into them, they’re going to start rotting and decomposing. Once they start decomposing, it’s hard to determine how much time you have left; some pumpkins last more than a week, some last just a couple of days.
Of course, there are ways to put the odds in your favor, such as ensuring that your pumpkin hasn’t been heavily handled, getting a fresh pumpkin, or keeping it away from heat. However, the surefire way to ensure that your pumpkin keeps its design is to carve it later rather than sooner, and to work quickly. Professional pumpkin carvers start carving a day before an event, but for the rest of us, two or three days before Halloween is fine.
Use Electric Tea Lights
A pumpkin’s greatest foe is heat. Too much heat makes them rot faster, and that’s bad if you want your pumpkins to stick around. Instead of using candles, using LED tea lights are a great way to prevent rotting, and to also avoid fire hazards.
Keep Your Pumpkin Cool
Besides avoiding heat, it’s wise to actively cool your pumpkin down. If you don’t live in a snowy climate, that’s easier said than done.
You can start by keeping your pumpkin in a fridge. When you need the orange beauty presented on your front porch, you can regularly spray it with a mixture of water and bleach. Bleach will keep mold away, and water will keep your pumpkin moisturized.
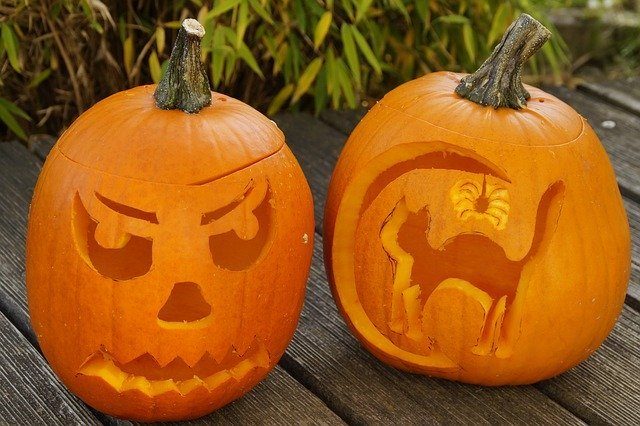
Pumpkin Carving Ideas
While easy, geometric faces are common pumpkin carvings, don’t stop there! More intricate designs are not only fun, but can gain you excellent bragging points. Sometimes, you don’t even have to carve the pumpkin at all!
For those who would like to decorate with pumpkins, whether indoors or outdoors, for Halloween or any time of the year, you have many creative options. From vases to stencils, the possibilities are endless.
We have the best line-up here, but if you’d like more pumpkin ideas, check out this list from The Spruce Crafts, or this list from Southern Living.
Pumpkin Vase
Possibly the most unique pumpkin carving idea, this one thinks outside of the box.
Instead of carving your pumpkin as a jack-o-lantern, why not give it an entirely different purpose, like a vase? This style only requires you to paint the pumpkin and fill it with flowers.
Procedure
- Cut out the top of your pumpkin as you normally would (not the back, since we need the full vegetable here).
- Paint your pumpkin. A white pumpkin can save you a bit of time, but otherwise, coat your pumpkin in a layer of white paint as a primer. This will help you achieve an even coat, and whatever color you choose next will stand out.
- Paint your pumpkin any color you want. A simple, geometric pattern will also make for a fun design.
- Once your paint dries, add water and flowers. For the flowers, it’s best to opt for large flowers (like sunflowers) to fill the top. Stuff any loose spaces with filler flowers, like daisies and baby’s breath.
Black and White Pumpkins
This design is for those who would like something different, but are pressed for time. These black and white pumpkins use white pumpkins and are decorated with black accents. They’re elegant and simple, while still giving off a delightfully creepy Halloween vibe.
You can create your own designs, but we love the following:
- Line the pumpkin from the base to the stem with black, decorative, and preferably lacy ribbon, securing it at the top with small t-pins.
- Alternatively, you can use a thicker ribbon (preferably velvet) and tie a large ribbon on the top of the pumpkin. You can also tie the ribbon across the pumpkin instead of vertically.
- Paint simple shapes with black paint. This one works best with a stencil for crisp, clear lines.
- Paint one pumpkin solid black. This is a great addition to a group of pumpkins bunched together, as an accent.
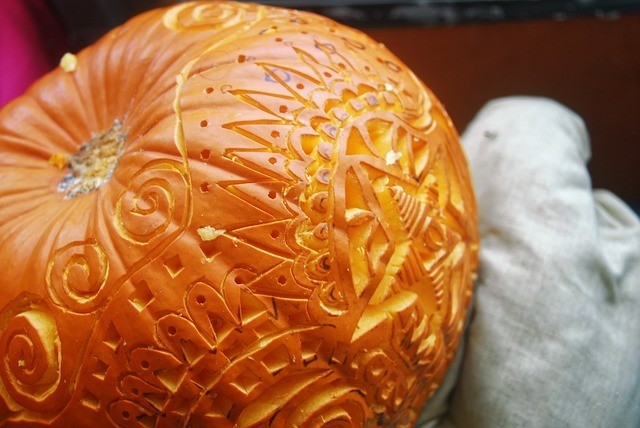
Pumpkin Stencils
For those who love intricate carvings, this ornate design has you covered.
Procedure
- Find a stencil pattern; this should be black and white and sized correctly. Print out your pattern.
- Wipe the surface of your pumpkin with alcohol or soap and water. Let dry.
- Cut open your pumpkin and scoop out the insides. For thicker pumpkins, make sure to thin the pumpkin walls from the inside, especially the spot where you’ll be carving.
- Transfer the pattern onto your pumpkin by shading the back of the paper with a pencil. Make sure that it’s a thick enough layer. Tape the print-out to the pumpkin (with the design at the front) and trace the design. The graphite at the back should stick to the pumpkin surface.
- Trace over the design with marker or sharpie.
- Once the design is easier to see, cut out your pumpkin!
Conclusion
Pumpkins don’t have to be the same spooky face year after year. Hopefully this guide has sparked some pumpkin carving ideas for your next Halloween!


