
Whether it’s for a wedding or another form of festivity, sky lanterns are a fun way to celebrate, as they decorate the sky like stars ascending the heavens.
These paper-made ornaments were originally from China and still hold a key place in many traditions throughout Asian counties.

Now, however, everyone, including you, can make one. Yes, you can easily make one right at home!
Contents
How to Make Sky Lanterns
Materials
You can find the following materials at your local arts and crafts store, and some even at home.
Here are the materials you need to make DIY floating lanterns.
- Color paper.
- Aluminum foil.
- Plastic straws – some thick, some thin.
- Transparent tape.
- Cotton.
- Acetone/kerosene or any other fuel that’s available.
- A small container that’ll shape the foil (like a candleholder).
- Two copper wires (or wire of another variety).
- Thumb pin.
- Scissors.
- Glue.
- Knife.
Once you’ve collected your supplies, it’s time to move on to the next step.
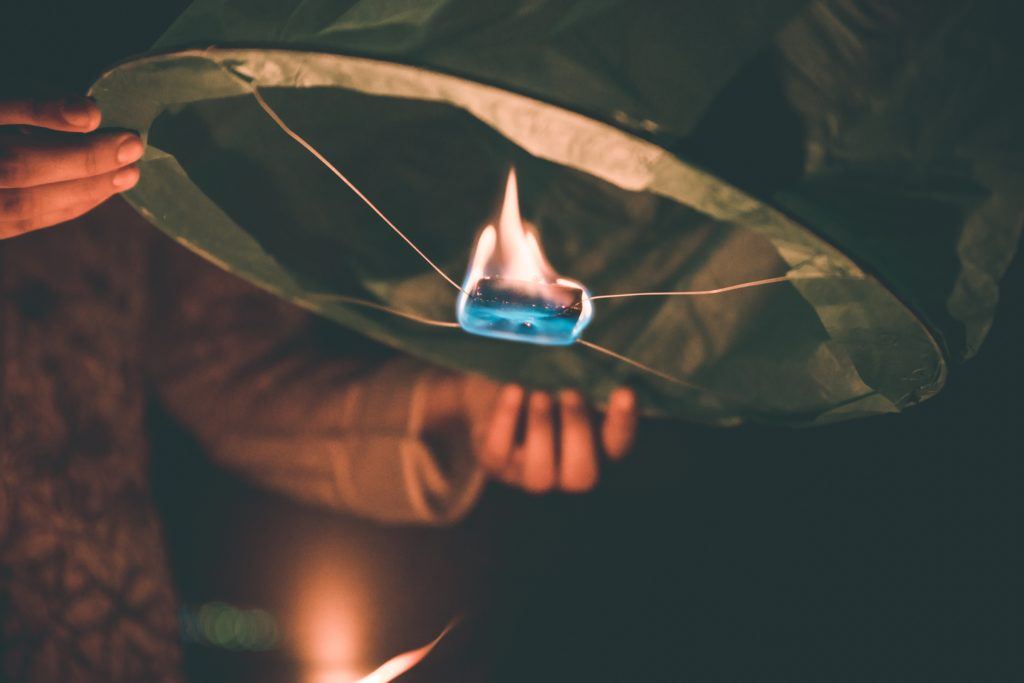
Creating the Burner
The first thing you should do while setting up your lantern is to work on the burner. The burner is what’ll keep your lantern afloat; without it, then what’s the point of making a sky lantern?
Here’s what you must do:
First, cut the aluminum foil into a piece that can fit right into a candle holder (or any other similar container). Carefully shape the foil around this holder.
Next, you’re going to use that cotton as a wick for the burner.
In order to light it, you’ll use acetone, kerosene, cooking oil, or a candle flame. Any kind of fuel works, really, but just be careful while using it.
After you’re done making the burner, you can move on to the more creative steps.
Making the Frame
While your lantern should be sturdy enough to hold its shape with the envelope alone (to be discussed later), it’ll, unfortunately, be too weak to hold your hot-air-making equipment. This is where the frame comes in!
First, you should cut your thick straws into four pieces, and then your thin straws into four pieces of similar length.
Next, you’re going to arrange the four thick straws into a square shape. Tape them at the corners so they maintain this structure without being held.
Now use the thinner straws as supporting beams. These thin straws should be spaced evenly apart and taped to the thick-straw base.
This completes your frame. When you’re finished, it should look similar to a crown with multiple points!
Attach the Burner to the Frame
Now we’re going to attach the burner to the frame.
First, use the thumb pin and poke four holes into the burner.
Next, insert the two copper wires into the holes you’ve made and tie them securely.
After this, tie the other ends of the copper wires to the support beams of the frame. At this stage, the burner should span the gap in between while sitting just above the base.
Even once you tie the wires, be sure to secure them once more with tape, so it’s extra safe.
Making the Envelope
“Why make an envelope?” you might ask. It’s not like we’re sending a letter! This is true, and while you’re welcome to write interesting messages or quotes on the lantern, overall, the envelope will serve as your skin for the lantern.
When exploring how to make a flying paper lantern, it’s key that the skin and framing are light enough to ascend into the heavens, while still remaining sturdy enough to hold your equipment for creating hot air.
First, fold your plain or colorful paper in two equal halves. If you don’t have any colored or letter-writing paper, newspapers are useful as well.
Next, you have to measure and mark the paper in a semi-diamond shape.
Then, you need to cut the paper into four similar pieces.
In the end, the edges of your paper will be glued together and form a bag-like structure. Be sure to compare it to your frame, so they match well!
Assemble Everything Else
Here’s the final crafting step!
Take your envelope and place it over the frame, careful not to tear its edges. Attach it at the corners with tape.
When that’s settled, cut small fins at the corners to give your lantern a nice, final touch. It also provides improved balance while it’s floating in the air.
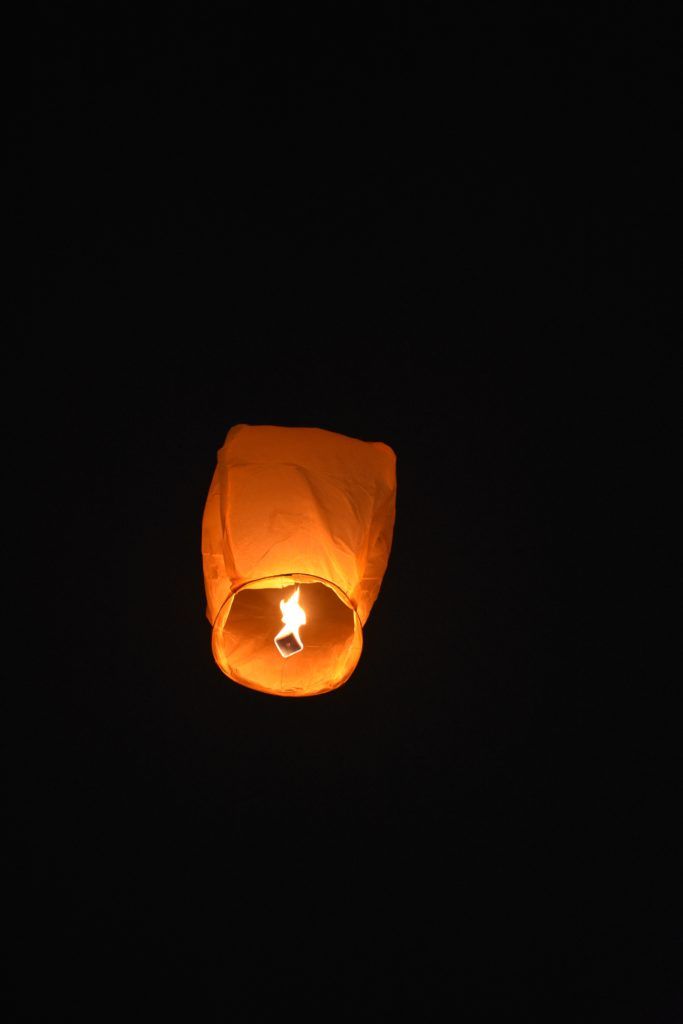
Let Your DIY Floating Lanterns Fly!
Congrats! You’ve learned how to make a floating lantern. All that’s left is to take it outside during a particularly dark night and prepare for lift-off.
In order to make it ascend, carefully apply flame from a lighter to the cotton burner. While holding it in your hands, wait for the fire to develop enough hot air within the skin (or bag) to take flight.
After that, gently nudge it into the air and watch it fly! Should it not fly right away, give it another few moments and try again.
In the worst case scenario, replace the cotton with a new piece soaked in slightly more fuel – though not too much, or else you’ll have a torch instead of a lantern!
Here’s a video showing an example of how to make a floating lantern.
Have you tried making your own DIY floating lanterns?


