
Whether you are decorating your home, creating a handcrafted gift, or want to breathe life into an old, dingy lamp, DIY lampshades are the solution.
Since they require very few materials (all of which are simple to obtain), they are a cost-effective project for you to mix-match and customize.
So, if you’re wondering how to make your own lampshade, look no further than this guide! We’ll take you through all the steps, with a few easy tricks to smooth out the process.
Contents
DIY Lampshade Designs
First things first, obtain a lampshade frame – otherwise known as that metal skeleton the fabric or beads wrap around.
If you don’t currently own one, then pop into your local thrift store. They may have ones freshly stripped of their previous style, or you can easily remove whatever covering existed beforehand.
Fabric Lampshades
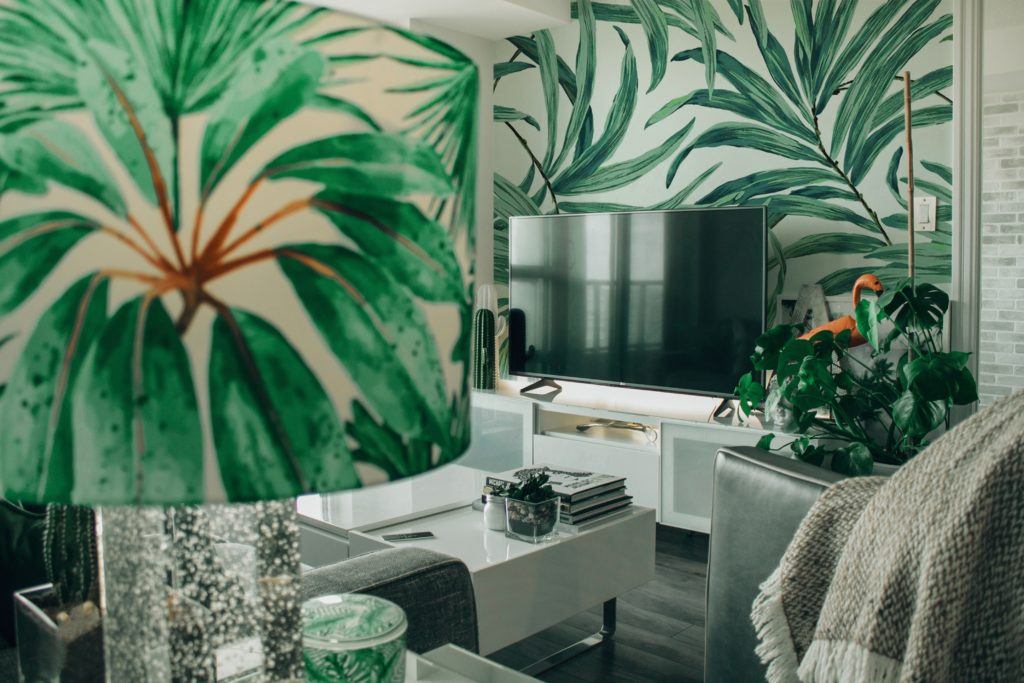
When spiffing up an old lampshade or simply tailoring a lamp set to the theme of a room, fabric lampshades are the way to go!
Pop into your local fabric store and browse through their vast selection for the colors and textures that suit your plans.
Avoiding silks and satins, which don’t do well with heat, instead pick up cotton-blend materials. You could even go with lace! It’s wise to purchase a yard of fabric, or more if your lampshade frame is abnormally large.
Once you have your desired material, wrap it around your lampshade to measure the length and width of fabric needed, and mark the fabric with a pencil or fabric pen accordingly.
After this, cut it to size, leaving a good inch or more as a border if you wish for the drum to be completely enveloped.
Spread a fabric glue on your lampshade and carefully smooth the material onto the sticky surface. If there are any borders, coat the underside of them in glue and fold them over the drum’s rim.
Bead Curtain Lampshades
For a funkier theme, beaded curtain lampshades are a fine touch. The kids will love helping string the beads too, so break out an old bottle of mismatched beads hidden away in your cupboard and have some fun!
You will need wire, pliers, and beads – all of which can be found in kits at the art store, should you lack them. You will also need a tall lamp base, so that you have plenty of room for your beads to dangle!
Throw together however many bead strings you want, tie them off, and set them aside.
Depending on the kind of lampshade ring you have chosen, you may need to drill small holes to loop the bead strings through. As this ring will be fully exposed, browse around craft stores for ones that are inlaid with patterns for an extra elegant look.
Once your lamp ring is prepared, begin hanging your lovely bead strings! Double knot them to make sure that everything is secure.
Bouquet Lampshades
Flower crowns are all the rage this year, so add them to your living room décor as well!
You will need a hot glue gun, scissors, and quite a number of fake flowers – the latter of which can easily be found at the dollar store.
Once you have a few bundles matching your desired colors and styles, trim the stems off close to the base of the flower.
Take your old drum lampshade, apply a healthy dose of hot glue to the base of your first flower, and press it tightly to the fabric surface.
As these flowers do have a slight weight to them, you should hold them firmly in place while the glue dries – for about 30 seconds each.
With a range of flower types to choose from, you can diversify the bouquet to be classy roses, cheerful daffodils, pretty sweet peas, or anything else to suit your room’s décor.
DIY Doily Lampshades
If you have a handful of doilies laying around in storage, grab yourself a large balloon and craft glue. These lampshades look stunning while also casting beautiful shadows on your walls!
Start by inflating your balloon and mounting it in a bowl to keep it steady. Create a glue and water solution, dunk your doily in this liquid, and lay it over the balloon.
While leaving a space at the top to fit the lamp wiring kit in, continue to lay your doilies on the balloon until you have reached your desired coverage. It is a good idea to have your doilies overlap to strengthen the overall lampshade.
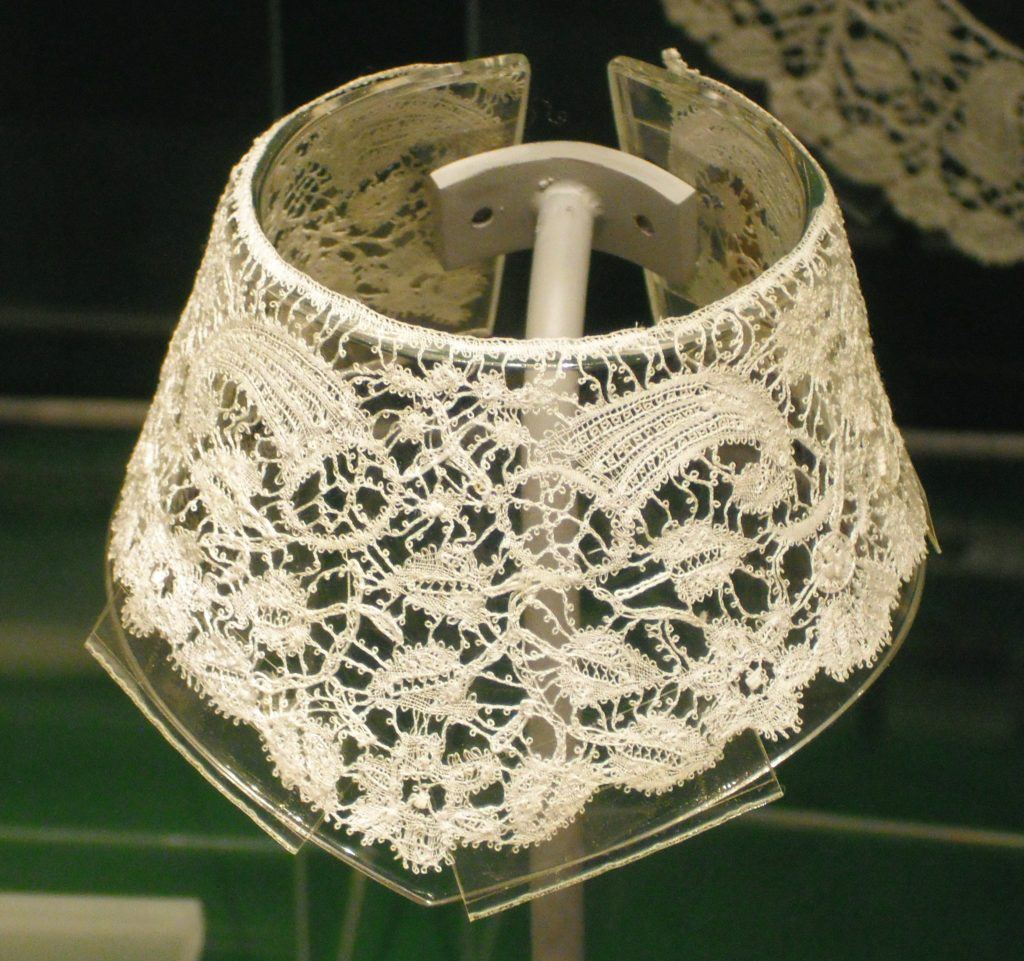
Let the glue dry for a full 24 hours, then apply a second coat of glue to any areas you feel may need extra support.
Once everything is dry, pop the balloon and insert your lamp kit. Use a low heat bulb to prevent the glue from deforming.
If you want a splash of color, or are using rather old and yellowed doilies, then feel free to dye them! Lampshades made from dyed doilies bring a lively pop of color to any room, even when they aren’t lit!
Scale Lampshades
Scale lampshades are visually stunning and a fun DIY craft project that can be customized in a number of ways.
Although it’s rather time-consuming (better suited for the weekend instead of the afternoon) the end results are beautiful and will be the envy of your guests.
You will need:
- Circle cutter.
- Enough sheets of #110 paper to make 100 – 200 circles.
- Paraffin wax.
- Color dyes of your choice.
- A hot glue gun.
- A large paper lantern with a 60-watt compact fluorescent light bulb.
Start by filling up one or more buckets with your chosen dye solutions. Once those are ready, begin cutting out your circles.
Dip them into the coloring for a few seconds, allowing them to soak up the pigment, before pulling them out to dry.
After all of your circles have been cut, dyed, and dried, make a double boiler (a heatproof bowl sitting on top of a pot filled with boiling water) on your stove.
Pop the paraffin wax in the bowl to melt and then begin dunking your circles in – leaving a 1-2 centimetre strip at the top that’s free of wax.
Set them aside to cool. (The wax makes the paper semi-translucent, which results in an extra special appearance!)
Now, heat the glue gun and flip your paper lantern upside down. Slather a decent coating of glue over the wax-free portion of your circles and begin sticking them to the lantern. Be sure that the edges of each circle in the first row touch, providing a fishscale pattern.
From there, glue on the next row – placing each new circle so that, vertically, it sits in between two circles below, while, horizontally, the middle reaches the top edge of the lower row.
From here, repeat the process above until all the circles are attached. Once all the glue has set, flip your lantern upright and turn it on. So long as you use low-heat fluorescent bulbs, the wax won’t melt.
Twine Lampshades
Whether you’re seeking a nautical theme or just appreciate the rustic look of twine, twine lampshades are simple to create and require very little effort or time.
Take an old drum lampshade, a large roll of twine, and tie one end of the twine to the metal frame inside the drum.
From there, begin wrapping the twine vertically around the drum. Go slow and keep the columns neat. If necessary, dab touches of hot glue as you go to ensure the twine remains in place.
Once you have wrapped the drum completely, tie off the final end to the metal frame.
Stenciled Lampshade Design
There are two ways to create stenciled lampshades: By painting on a stretch of fabric, which you will then apply to the shade using the first DIY lampshade method above, or by painting directly on an existing lampshade.
Crafts stores have a range of flexible stencil sheets to choose from, so pick out a few which match your desired style or shape, and buy paint that matches the color scheme you prefer.
Lay your stencil over the lampshade, or fabric, and begin painting. Use gentle pressure so that the bristles of the brush don’t sneak under the stencil and blur the shapes of your pattern.
Once you have finished, allow it to dry for several hours, and then apply it to your lamp!
Color Blocked Lampshade
Color blocking an old lampshade is a fast way to provide a fresh new look to an old, well-loved design.
Lay a few strips of painter’s masking tape on your lampshade and break out the paint of your choice, preferably a kind suited for fabric, unless you use a hard drum.
Once you’ve painted it, peel the tape away and let it dry. For extra affect, you can sand the paint back to create a weathered look!
Ribbon Lampshade
Who doesn’t love a bright splash of color? Ribbon lampshades soften the brightness of the bulb and cast color-saturated light throughout the room. These are great for kids!
You will need the metal frame of your lamp and a ribbon spool. Tying off the loose end at the outer part of the frame, with a tiny dab of glue if necessary, start wrapping the frame in the ribbon. Be sure to keep the ribbon tight and evenly spaced; you can double wrap if you want a darker shade.
Once you have reached the desired shade, snip the ribbon and tie the loose end onto the frame. Again, secure with a dab of glue if necessary.
The best part? You can cut the ribbon away and reuse the frame with another type of ribbon if your tastes change!
Here’s a video showing an example of a DIY lampshade makeover.
What’s your favorite lampshade design?


