
The latest in our crafting 101 series is this complete guide to screen printing and silk screen printing.
Not only is it incredibly fun to do, and a great way to create beautiful pieces of arts and crafts, but it’s also really easy and accessible — exactly what we look for in a crafting project.
We’ve pulled together all our knowledge and experience with screen printing to bring you this guide, which covers what it is, how to do it and what you need to do it well.
Let’s get started…
Contents
What is Screen Printing?
If you’re looking for a fun new way to expand your creative horizons, screen printing could be just the thing you’ve been waiting for.
Screen printing allows you to print and reprint designs onto fabrics, papers and other surfaces quickly and easily.
Also known as silk screening, screen printing has inspired some of the most famous modern artists, including Andy Warhol who used the technique to produce his iconic pop art images of Marilyn Monroe and tins on Campbell’s soup.
It’s a great skill to learn, and can be used for a vast array of projects in a multitude of ways — your imagination is the limit!
Screen printing is super easy to do at home, even if you don’t have any prior crafting experience. It’s fabulous fun for both adults and kids, gives results quickly, and has plenty of practical applications.
All you need to start is some simple equipment which can be easily bought from craft stores, or if you’re feeling confident can even be made very cheaply by yourself at home.
Want to personalize that boring old T-shirt? Or how about printing some of your original designs onto scatter cushions or dress fabric, whipping up some cool posters featuring your artwork — or even printing your own unique wallpaper? With screen printing you can do all this and more.
How does Screen Printing Work?
In around 200 AD Chinese artists invented the simple yet effective screen printing technique. It’s one of the most ancient ways of printmaking and, thanks to its ease of use and popularity, is still widely used today.
These days high tech machinery is most often used to produce screen printed designs in large numbers, but excellent results can be achieved with basic equipment in your own home as a DIY project.
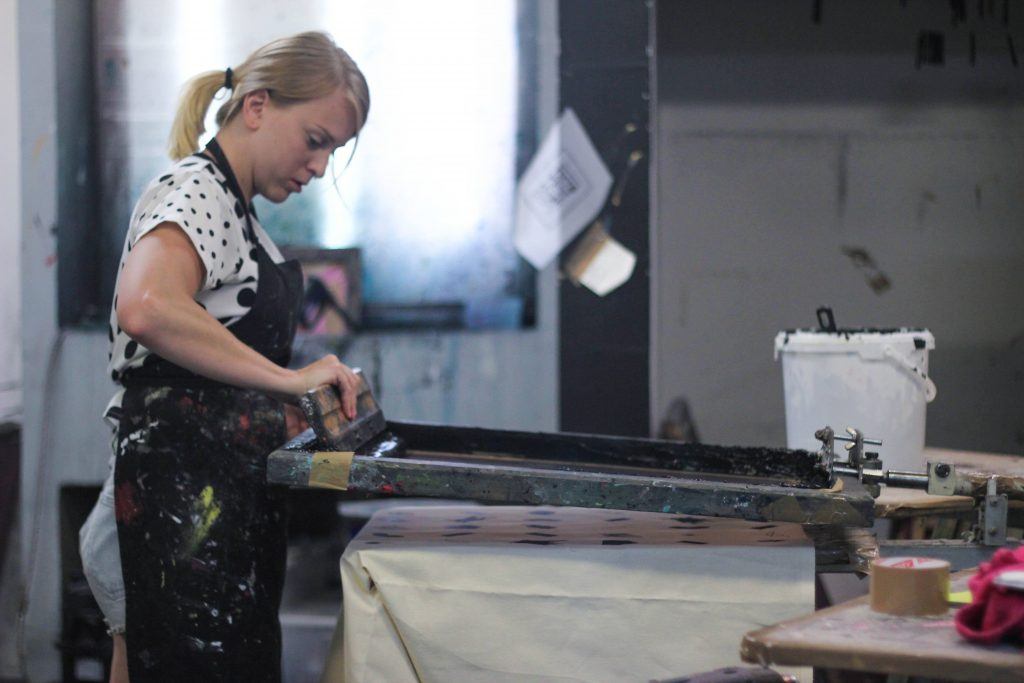
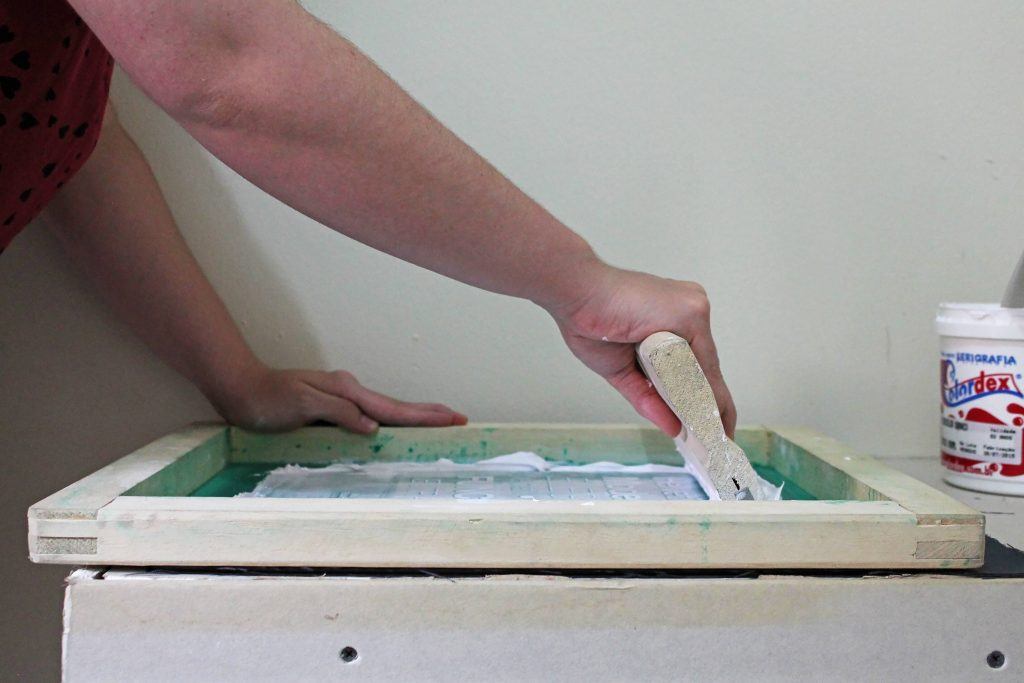
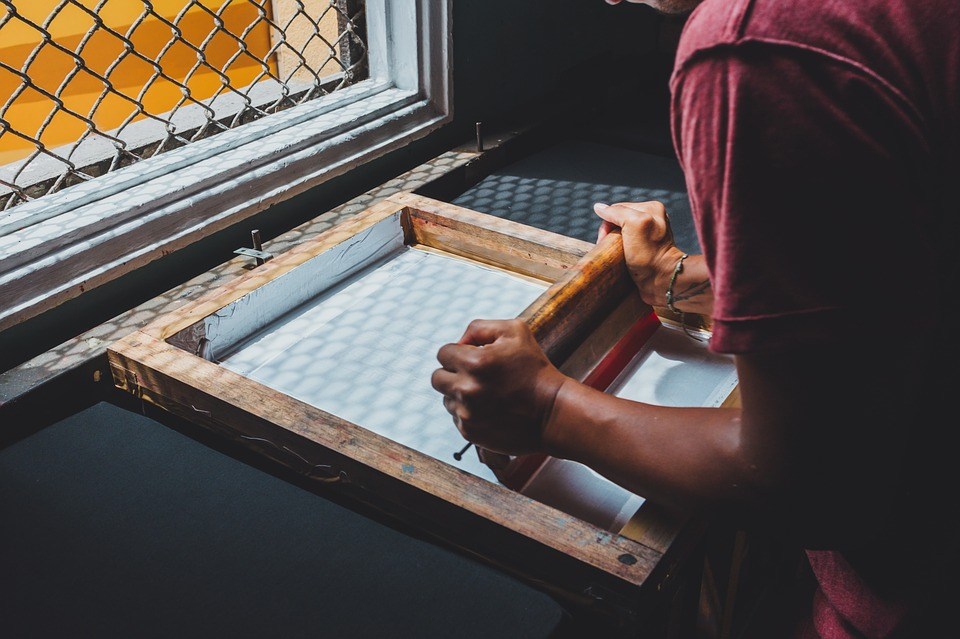
The principle of the process is using inks and stencils to transfer an image onto your chosen surface.
Stencils are laid onto a frame with a fine woven mesh, which when covered with ink transfers the image onto whatever material you choose.
Where there are areas cut out of the stencil, the color will pass through, and the solid parts of the stencil in other areas of the design act as a barrier which stops the ink from transferring in those areas.
The ink is forced through the mesh with the aid of a squeegee or similar tool with applied pressure to ensure that it is evenly spread across the stencil. When the frame and stencil are removed, a perfect copy of the image is transferred onto the chosen surface.
This process can be repeated multiple times as long as the stencil and mesh are clean and in good shape.
It may sound a little complicated, but there’s no need to be intimidated — it’s a lot more simple than it sounds! Plus, it’s one of those crafts that gets easier and more intuitive the more you practice.
Screen Printing Equipment
Here’s a list of screen printing essentials, the most important of which we’ll look at in more detail next…
- Printing screen
- Stencil
- Ink or paint
- Squeegee
- Tape
- Pencil / pen
- Craft knife
- Cutting mat
- Iron
Printing Screen for DIY Screen Printing
The printing screen is made from a fine mesh material fixed to a wooden frame.
Ready made frames can easily be bought online or in hobby stores.
It’s also possible make your own printing screen, by attaching fine nylon mesh to an embroidery hoop, old picture frame or any other wooden frame.
If you’re making a wooden frame, you’ll need bolts and wood glue to fix all four sides together.
The mesh should be pulled tight across one side of the frame, and fixed with wood glue and stapled with a staple gun. If the mesh isn’t tight enough ink will leak around the sides.
To make sure you’ve got the right fabric hold it up to the light — if you can see tiny squares it means that ink will pass through it and it should do the job.
Here’s a good video on making your own screen printing frames:
Screen Printing Machine
If you’re happy to spend a bit of money in exchange for a ready-made machine that will deliver high quality and consistent prints, you might want to consider a screen printing machine.
You can buy table top silk screen print machines readily online, usually very reasonably priced, so you may think this is a worthy investment.
It’s certainly more convenient and intuitive than using just a normal printing screen. If you’re planning on doing multiple prints, or prints of multiple colors, then a screen printing machine should be included in your budget.
Here is one of the best screen printing machines on the market right now:
DIY Print Shop Classic Table Top Screen Printing Kit

If you like the look of the DIY screen printing kit above but you’re on a budget, this kit from the DIY Print Shop could be right up your alley.
It doesn’t come with a printing machine — hence the low price — but it does have everything you need to get started: wood 16″ x 20″ screen, DIY hinges with screws, 156 mesh screen, 10″ squeegee, Green Galaxy pitch black ink and a full supply kit, including light bulbs, tape, cleanup cards, degreaser and emulsion stripper.
Pros
- Low cost
- Everything you need to get started
- Best for beginners
- High quality packaging
- Easy to set up
- Can use on a variety of different materials
- High quality products
Cons
- Doesn’t come with a press
- Still more expensive than buying everything separately
![]()
Stencil
There are many different ways of making a silk screen stencil.
One of the most simple ways is to trace a printed design or draw freehand directly onto the printing screen mesh. Using a brush and non-water soluble glue or other impermeable medium like Mod Podge, paint the mesh everywhere where you don’t want ink or paint to pass through, including everywhere around the outline of the design.
Let your design dry thoroughly and it should be ready to use.
Obviously when you wish to change your design you will have to replace the mesh and start over. It’s for this reason that this method works particularly well when using an embroidery hoop as the printing screen, as the mesh is easy to remove and replace.
Another pain free method of stencil making is to print or draw your design onto wax paper or acetate and cut it out using a sharp craft knife.
Be careful not to pierce the paper or leave jagged edges as this may cause ink or paint to bleed through where you don’t want it to show.
When the design is cut, place the paper or acetate stencil on top of your printing surface and place the print screen mesh on top – you may want to tape it down at the corners to stop it from moving around. This type of stencil works best for small batches of printing.
Lastly, probably the most hi tech home method of making a stencil is to create a design on a computer, either by using software such as Adobe Photoshop, or by scanning hand drawn artwork.
These designs can then be printed onto a transparent acetate sheet.
Meanwhile, cover the silk screen with an even layer of photo emulsion (this should be done in a dark room). Photo emulsion is a substance that hardens when exposed to direct sunlight or other forms of bright light, creating a barrier against ink and paint.
Once the screen is painted with photo emulsion, leave it for around two hours in a box or somewhere else where light can’t get to, so it can cure (this means go hard).
After this time it will be ready for you to apply your printed stencil.
Still working in a darkened space, position the stencil on the screen and cover it with a sheet of clear glass to weigh it down.
Then shine a strong light source such as UV lights onto the screen for ten minutes (or however long necessary according to the instructions) to set the design onto the mesh.
Once the time is up all that’s left to do is to rinse the screen with water to remove the excess product, and you’re ready to start printing.
Don’t forget to store your stencils in a dark place if you want to reuse them later!
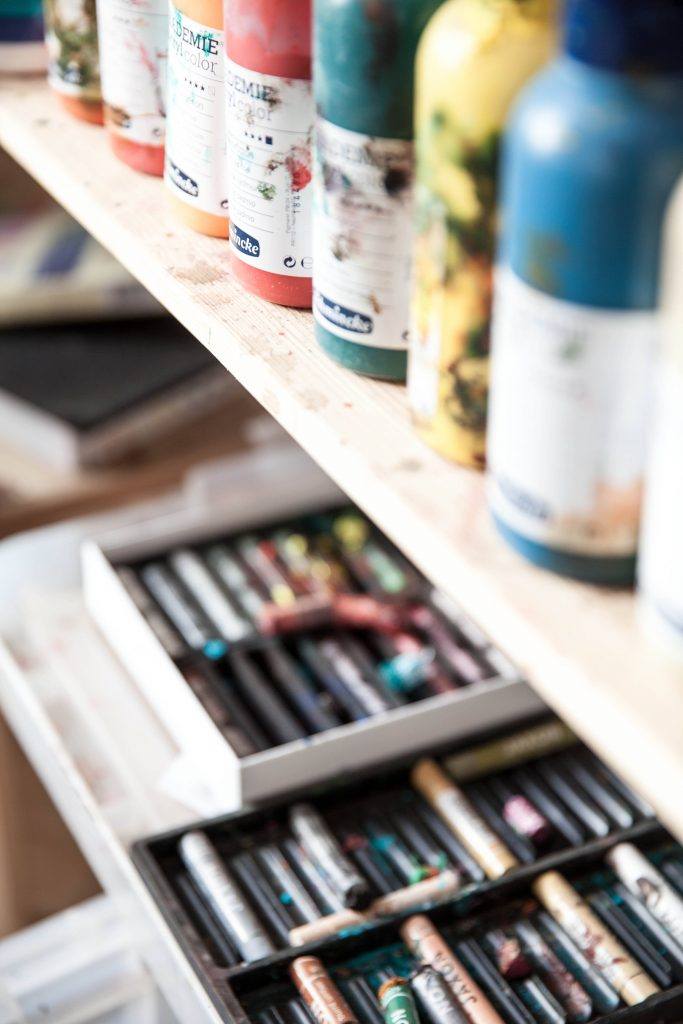
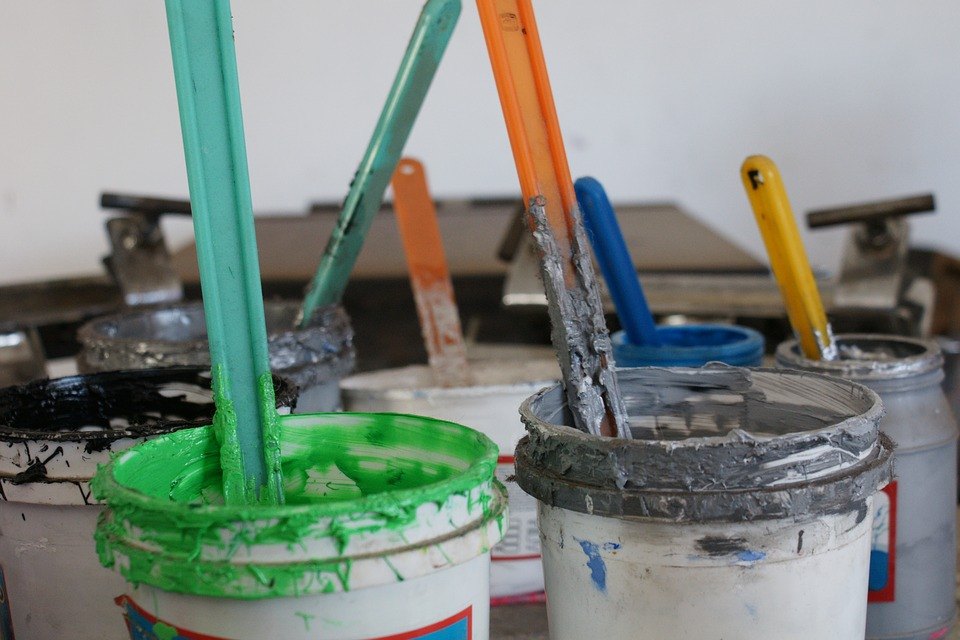
Inks and Paints
Whether you choose to use ink or paint is dependent on what material you will be printing onto.
Let’s take a look at the best paint and ink options for screen printing onto textiles, followed by a guide to which inks and paints are best to use when printing onto paper.
For T Shirt Screen Printing
- Fabric Paint
Textile paint is the cheapest and most easily available medium for hobby crafters who are looking to complete small projects like t-shirt designs in small runs or one off prints.
Most fabric paints will work fine for this kind of application, but it isn’t very appropriate for large quantities of prints.
Fabric paint is acrylic and will need to completely dry after application. Most fabric paints require heat setting to lock the colors onto the textile. This is where your regular household clothes iron comes in handy.
Typically you’ll need to iron the reverse side of the fabric for a few minutes in order to completely bond the paint to the material and prevent it from coming out in the wash.
It’s also worth bearing in mind that fabric paint stains can be tough to remove from your print screen, so it’s best to wash the mesh whilst the paint is still damp.
- Plastisol Inks
Plastisol (PVC) inks are widely used for commercial screen printing.
They are incredibly easy to use and have a fantastic opaque appearance even on colored and dark fabrics because the ink stays mostly on the surface of the material instead of penetrating it.
Plastisol inks contain thermoplastic particles and they need to be heat cured at 320-330 degrees Fahrenheit in order to set firm.
The plasticity of these inks lends itself best to small designs, and they are often available in special effects finishes such as glitter, metallic and puff ink.
Because they require heat to set instead of air drying, excess ink can be scraped off the print frame and put back in the container for re-use. In most cases the finished articles can safely be machine washed and even dried in the clothes dryer.
- Water Based Inks
Water based inks are a little less popular in the commercial world, but nonetheless they give great results and they are excellent for hobbyists.
Being water based they are more easily absorbed by fabric fibers, which means they feel softer without the synthetic feel of plastisol inks.
They work wonderfully for larger, more intricate designs — particularly for areas where flexibility is important and on stretch fabrics.
Water based inks are very user friendly as they can be heat cured at 220 degrees Fahrenheit, or simply left to air dry — another point which makes them a good choice for DIY projects.
For printing lighter colors onto black or dark colored fabrics you’ll need discharge inks. These special water-based inks effectively strip the original dye color from the fabric at the same time as permeating it with the new color.
The effect is often soft with that ‘washed out’, muted, or vintage feel.
On the downside, it’s worth noting that these inks are quite chemical and can be unpleasant to handle, so gloves should be worn when handling them and the room should be ventilated at all times.
For Screen Printing on Paper
- Water Based Inks
Easy to buy at most craft stores, water based inks are ideal for screen printing on paper and there are a large variety of ready mixed colors available.
Water based inks tend to stay on the surface of the paper rather than being absorbed, and they air dry quickly so you can see your finished results fast.
They are incredibly easy to apply and quick work to with, and they can be used to screen print on any kind of paper or cardboard, including handmade or textured papers.
- Acrylic Paint
Although not the number one for screen printing onto paper, acrylic paint can nevertheless produce some excellent results when used correctly.
It’s a cheap, colorful medium which is great for experimenting or even doing projects with kids.
Because it can be applied thickly, it can produce some unique and often unpredictable effects, plus it can be used on any paper surface — and even other surfaces too.
It also has the added bonus of drying fantastically quickly.
Be warned that acrylic paint can clog up the print screen, so be quick to wash it thoroughly after use.
Squeegee
This is a basic — but crucial — piece of screen printing kit that can be bought specially designed for silk screen printing from a craft store, or inexpensively from hardware or home improvement stores.
It’s important to make sure that the squeegee has a rubber blade and a comfortable handle that is easy to grip.
Where to Buy Screen Printing Equipment
Amazon
We buy almost all of our crafting tools and equipment on Amazon — it’s convenient, there’s a huge range and variety of options, and you can often find the best deals on there.
Of course, if you prefer to do your shopping offline, or simply don’t like using Amazon, there are plenty of places that you can stock up on your screen printing equipment…
Walmart
For a good, basic selection of affordable screen printing supplies perfect for beginners, check out Walmart.
They stock a very decent range of printing inks for both fabric and paper, complete screen printing kits, photo emulsion, squeegees, and readymade mesh screens amongst others.
Screenprinting.com
Sells supplies from inks to frames, squeegees and more. Also in stock is a large range of readymade screen printing kits for beginners and for more experienced screen printers, as well as hi tech machinery including swanky presses, plus flash and conveyor dryers.
They’ve also got a blog with posts covering how-tos, industry news and featured screen printers, and a live chat facility if you need answers to questions in a hurry.
DIY Print Shop
Selling high-quality, easy-to-use, comprehensive DIY Print Shop screen printing kits for aspiring DIY screen printers.
Designed to liberate you from the learning curve and unnecessary trials and errors and get you screen printing in no time at all, all DIY Print Shop® kits are fully packed with affordable, high quality, screen printing tools, and are designed & manufactured in Brooklyn New York and Washington State.
Nevertheless Screen Printing Supplies
For both hobbyist and professional screen printing, Nevertheless offers a vast range of quality printing supplies, equipment, kits, services and education.
Products include screen printing kits, manual presses, exposure units, adhesives, chemicals, emulsion, tape, ink, screens, acetate, squeegees and more.
In addition they offer a variety of screen printing services, such as screen restretching, screen cleaning and reclaiming, screen coating and screen exposure.
Anthem Screen Printing
Having started their printing business out of their garage, Anthem are an authority on DIY screen printing.
Their store sells everything from DIY starter kits to pre-burned screens to get you off the starting blocks quickly, plus all the inks, emulsions, adhesives, squeegees, screens, and other supplies and equipment you can think of — even including some refurbished pre-loved items.
How to Screen Print
- Make sure that all tools are clean and ready for use.
- Prepare your stencil using your preferred method.
- Carefully place your stencil down flat on your piece of cloth or paper. Ensure that paper is correctly positioned and taped down at the corners to stop it moving about.
- Check that fabric has no annoying wrinkles in it that might sabotage the success of your print, and that the placement of the design is correct.
- Lay the print frame on top of the paper or textile ready to take the ink or paint.
- If there is space between the edges of your stencil and the edges of your screen, put masking tape on the underside — you don’t want paint or ink leaking and transferring where it shouldn’t.
- Pour a line of ink or paint that spans the whole way across the top of your stencil design (the end farthest away from you), starting further back than the cut out areas of the stencil to leave enough space to drag the ink or paint across smoothly. Make sure you use enough ink or paint so that you can coat all of your stencil easily, and go back over it if you notice there are areas that need a second coat.
- Place the rubber blade of your squeegee above the line of ink or paint and drag it downwards all the way across the stencil using firm, even pressure so that it is completely covered.
- A reverse stroke drags the paint in the opposite direction and ensures good contact with the paper or cloth beneath the frame.
- Repeat this process using only vertical strokes (i.e. always from top to bottom and back again from bottom to top) until you are satisfied that your stencil has enough coverage.
- Don’t be tempted to make horizontal strokes as this can cause the paint or ink to clump and bleed. Try to use the least number of strokes possible.
- Once you have completed this stage it’s time to remove your frame. Remove any excess paint from it beforehand to avoid making a mess, and put it well out of the way to avoid contact with your finished print.
- Now it’s time for the big reveal. Take the stencil and lift it quickly and cleanly upward in a single motion. Whatever you do don’t drag the stencil as this will smudge your design.
- Leave your print to dry for the required time. If you’re not sure, the longer you can leave it the better.
- Remember that if you are printing onto fabric you will have to heat cure your print, so once it is completely dry you should apply your iron on the back of the fabric or on a sheet of wax paper covering the design. Always follow the directions provided for each specific product.
- While your successful print is drying, be sure to clean the stencil, the screen, the squeegee, and any other dirty utensils thoroughly so that they can be reused. This must be done as soon as possible before paint or ink dries and becomes tricky to remove.
Cheap Screen Printing: How Much Does it Cost?
If you are willing to make your own stencils (and let’s face it – that’s half the fun!) and print screens, silk screen printing can be a extremely inexpensive hobby.
Nylon mesh fabric shouldn’t cost more than four dollars a yard, equipment to make a frame around ten bucks, and a squeegee no more than five dollars.
Even if you choose to buy screens, stencils and other equipment, it doesn’t have to cost the earth.
Good quality paints and inks will cost you a little more, but they aren’t essential — certainly if you are just experimenting to begin with. Once you get the printing bug (and believe us when we say it’s addictive!) you may want to invest in more ‘professional’ store bought equipment.
Obviously the more advanced your needs, the bigger your budget needs to be.
For example large sheets of acetate cost an average of three to four dollars each, and prices for photo emulsion vary depending on quality, but it can be bought for as little as ten dollars.
Overall though, a generous budget of $50 will be more than enough to get you up and running quickly.
Top Screen Printing Tips
Get Inspired!
If you’re keen to print but you’re lacking design ideas, take a look through magazines and books for inspiration. Scan images and then print them out, or cut them out directly, and use them as templates.
And, of course, Pinterest is an absolute gold mine for screen printing ideas…
Size it up!
When creating your stencil make sure that it is the right size for your screen and doesn’t pass the maximum dimensions.
Likewise, ensure that your printing frame is big enough to fit the stencil and that is maintains the proportions on the printing surface that you would like to achieve for your finished product.
Think about Ink!
Using the right ink or paint is crucial to the success of your screen print.
For example printing onto fabric requires a different kind of ink to paper printing, and often requires heat to set it before the fabric can be washed.
Keep it Clean!
Ink is messy stuff, and it can take a bit of practice to get a professional finish.
If you’re printing onto clothing like t-shirts, put a layer of thick paper or plastic inside the clothing to stop ink seeping through both layers of fabric and staining the back as well as the front.
When you’re spreading the ink keep the action smooth and in one direction only to distribute it as easily as possible.
Also don’t forget to wear old clothes, otherwise you may end up with some unwanted prints on your favorite threads!
Advanced DIY Screen Printing
Got the hang of the basics and hungry for more? Here are some ideas for ways you can push your creative boundaries and increase your screen printing skills to craft even more unique projects…
Color Mixing
Screen printing can be so much more than just single color designs. How about mixing paints directly on the screen mesh? It can produce some fantastic effects like color swirls and gradients.
Layered Stenciling
If you’re feeling confident why not try creating a layered stencil design?
Stencil layers can be quickly and easily generated using computer software like Photoshop, or it can be done by hand with multiple print outs of the same design.
You’ll need to use a different screen for each stencil layer.
This requires a little more time, patience and practice to get right, but the end results can be awesome and look very professional.
Change Printing Surfaces
Screen printing needn’t stop at just paper and fabric projects.
Why not experiment with silk screening designs onto different and interesting materials, like wood, leather, or even metal? It will inspire you to new and greater heights!
Phew! Now that’s absolutely everything you need to know about DIY screen printing.
Any questions?


No Comments
Pingback: Peppers Crafts | Find out what craft trends we might see in 2018