
Who doesn’t love snuggling up under a good quilt? They’re beautiful, cozy, and functional. Perhaps the word conjures memories of your childhood home…
But did you know that quilts are just as fun to make as they are to sleep under?
With some time, dedication, and the right materials, your home right now can be a vision of coziness too!
We started our quilting journey a long time ago and so have compiled our knowledge into this comprehensive guide to quilting craft.
Hold on tight and we’ll tell you everything we know…
Contents
What is Quilting?
The most basic definition of quilting is just the act of sewing multiple layers of fabric together in order to create an object, like a garment or a bed cover, that is warm and sturdy.
This is fairly common knowledge, but what a lot of people don’t know is: this activity has been around for millennia, with the earliest known record of quilting coming from Egypt in 3400 BCE.
We can imagine Tutankhamun getting cozy under a quilt all right…
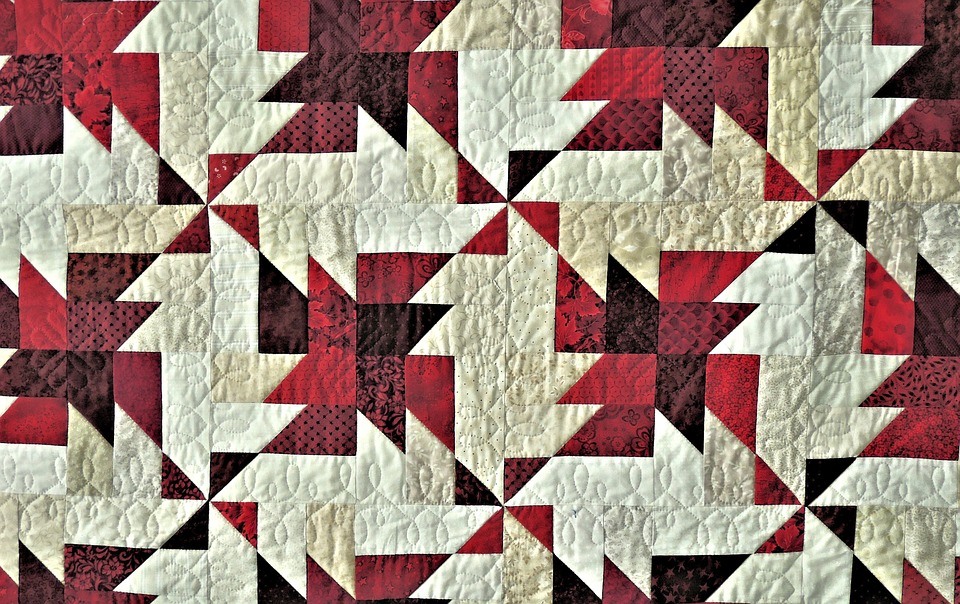
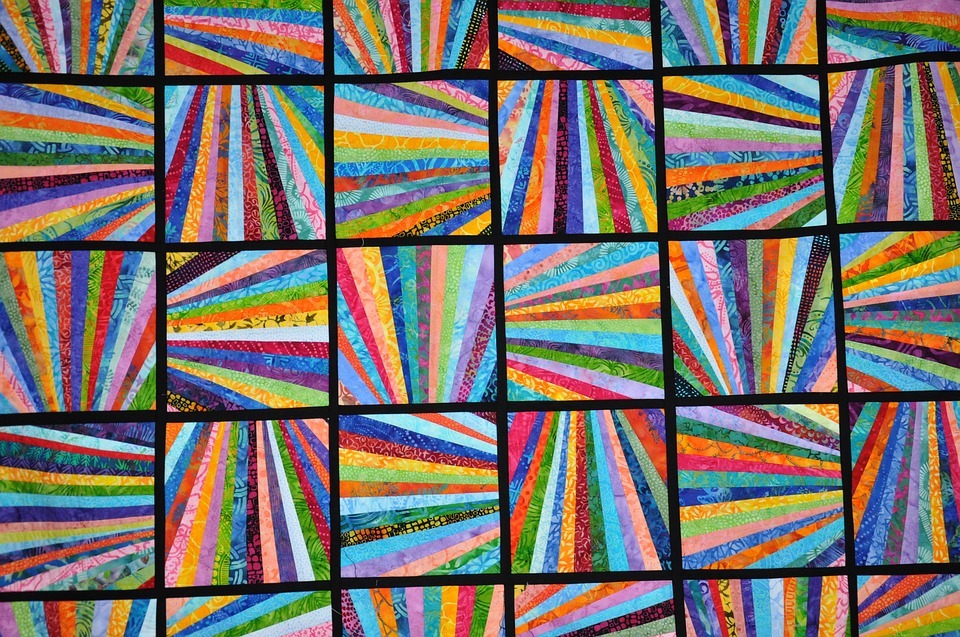
Today, most quilting involves three basic layers: the top, the middle (called wadding or batting) and the backing.
The top and backing are generally made of sections of fabric sewn together, usually in squares, although some advanced quilters like to use a fancier combination of shapes.
How to Quilt: Step by Step
1. Gather Quilt Supplies
The first thing to do will be to choose a pattern – go with a pretty simple one if you’re just starting out – and read it all the way through.
This will help you get a feel for what else you should have on hand, although it’s pretty safe to say you’ll need to take a trip to the craft store.
Choose as many fabrics as the pattern calls for, but the prints and colors are up to you. Just keep in mind that dark colors and busy prints can be difficult to work with.
We’ll be covering where to find quilting patterns later in this guide.
Other quilting necessities include:
- A rotary cutter: a round blade attached to a handle, kind of like a pizza cutter, but for fabric.
- A ruler: not the kind you used in elementary school. Quilting rulers usually look like flat, transparent rectangle with a grid pattern of precise measurements printed on.
- Self-healing cutting mat: sounds like magic, but they actually just contain a lot of PVC. These are important for making sure your rotary cutter doesn’t slice up your dining room table or (even worse!) your lap.
- Pins: lots of them!
- Needles and thread: We recommend getting a few of each that are basic and durable for new beginners. You can always get more particular once you’re sure quilting is something you want to stick with. If you are using a sewing machine though, be sure to get needles and thread that correspond with it.
These are the essentials, but there are a few other things you’ll probably want to have around too. We’ll include a list of those further down.
Once you’ve got all of these assembled, let’s get into how to make a quilt.
2. Cut Quilt Fabric
Your pattern should specify how many squares you need and of what size for your quilt top and backing.
Go ahead and cut these out now, using your rotary cutter and quilting ruler.
Make sure you keep a seam allowance of a half inch, meaning each edge should be cut about an inch longer than the square will be once the quilt is done!
This is very important for keeping the finished product from bunching up and being too small.
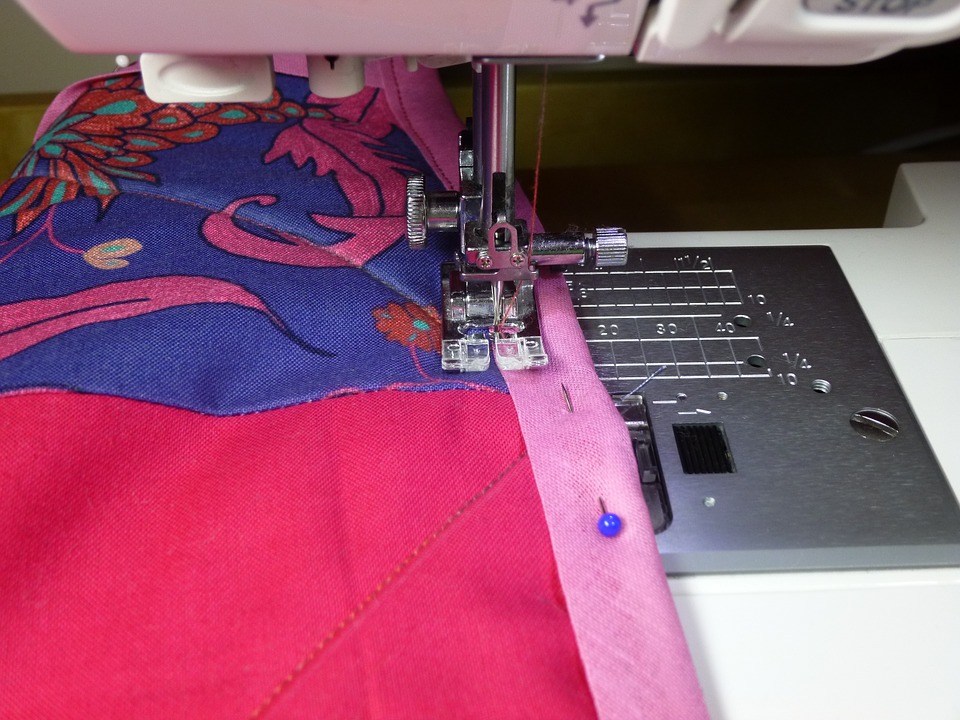
3. Piecing
This is how you’ll join the squares together to form the quilt top. Lay them all out on a flat surface in the formation that the pattern calls for.
Now, lay the first square of the first row by itself, face up. On top of that, place the second square of that row face down, so that the front sides of each square are facing each other in a little mini-stack.
For now, sew up only the right side of your mini stack. This is where the seam allowance comes in handy: sew a half inch from the edge of the squares, so that the edges stick out a bit from the seam.
You should now be able to open the mini-stack like a book, so that both squares are laying face up, attached in the middle. Place the third square face down on top of the second square, creating a new-mini stack, and attach that one the same way.
Repeat this for the rest of the row.
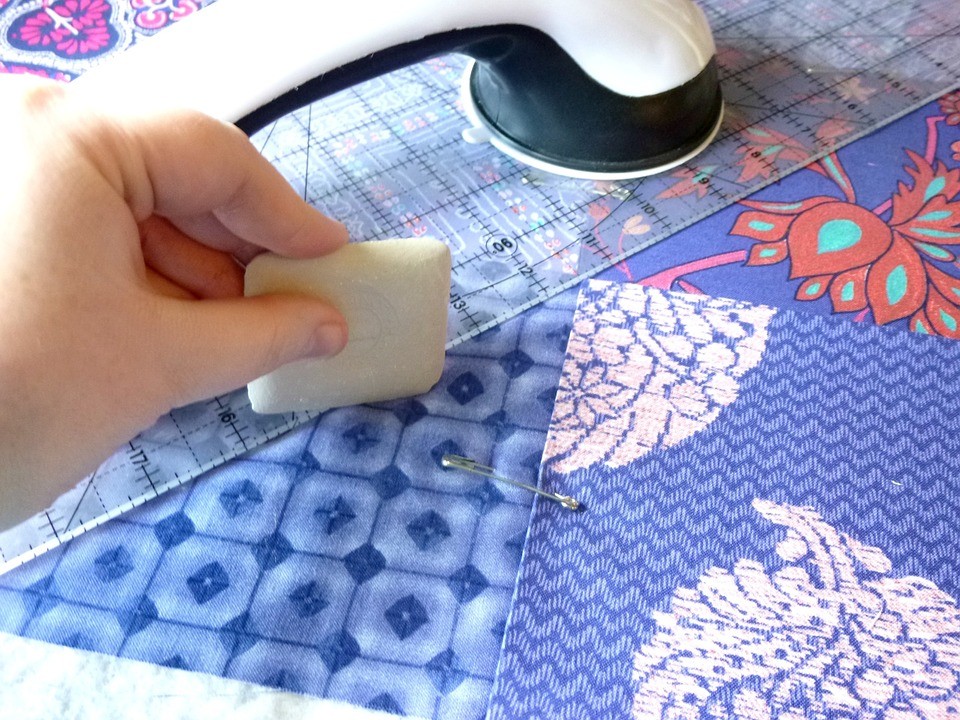
Once you’ve done this for all the rows, press them flat with an iron, and pin them together so that the squares line up. Now place the first row face down on top of the second one, and attach it the same way you did with the squares.
4. Adding a Border
Once you’ve got all your squares in your top layer joined up, measure the sides and cut four strips of fabric with the same lengths, plus the width of the border.
Make the strips a half inch wider than the width you want, for (you guessed it) the seam allowance.
Now, just sew each strip onto the corresponding side of the quilt top and you’ve finished the border!
5. Quilt Backing
The backing, or the bottom layer, can be either one big piece of fabric or squares attached together, using the same techniques we went over in the “piecing” step.
Once you have the backing all together, tape it down on a flat surface (a tile or hardwood floor usually does the trick). Make it taut, but not stretched out.
5. Batting
Also known as wadding, this is the layer of squishy material in the middle of a quilt. You may be tempted to shell out for wool or silk, but we recommend going with a cotton blend for your first project. It’s nice and durable, plus easy to work with
The batting should be slightly larger than the other two layers, for now. Lay it on top of the backing and place the quilt top over it, lining the layers up evenly. A lot of crafters call this the quilt sandwich.
Adhere the layers of your sandwich with safety pins, so they won’t get knocked out of place. This is called basting.
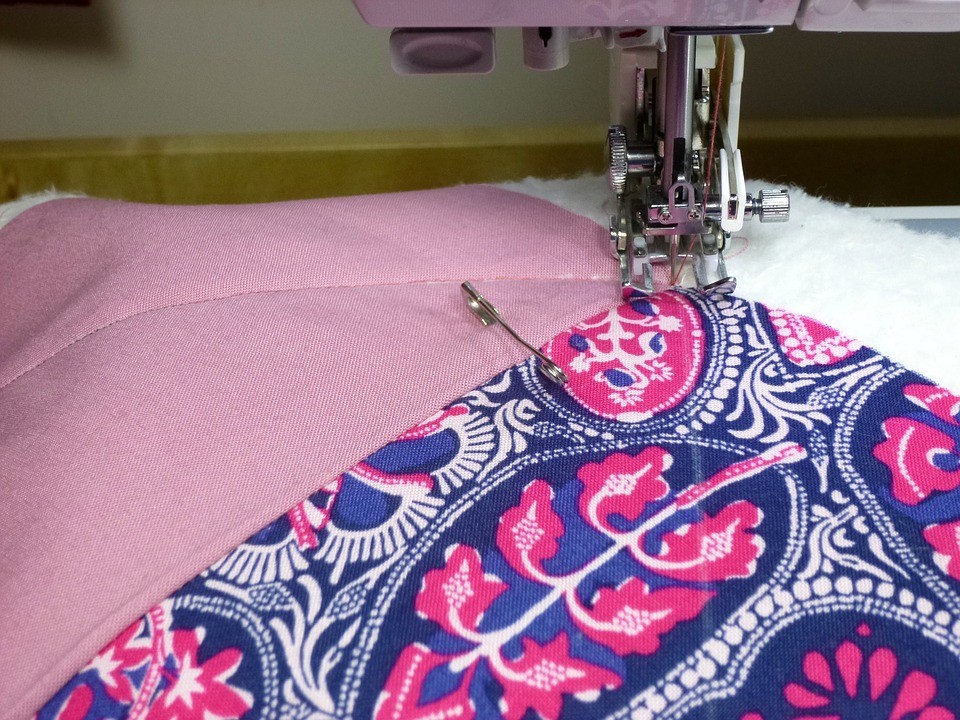
6. Quilting
We know what you’re thinking: er, isn’t that what we’ve been doing the whole time?
Yes, but “quilting” also refers to the process of stitching the layers together.
Consult your pattern, but some good techniques for beginners are stitching along the seams of your squares (quilting “in the ditch”), or stitching neat, straight lines parallel or cross hatched across your project.
Here’s a great video on quilting for beginners:
7. Binding a Quilt
Your sandwich should now be quilted all together, with some excess batting and the seams from the bottom and top layers sticking out from the sides.
Trim the excess batting off, then measure the perimeter of the quilt.
Take the fabric you want to bind it with and cut it into several thin, even strips. Attach the strips end-to-end until you have one really long strip that’s about 10 inches longer than your perimeter.
Fold the strip around the perimeter of the quilt and pin it in place. Now, just stitch it on and sew down the corners.
And voila! You’re a quilter.
Quilting Machines vs. Hand Quilting
One of the questions we hear frequently from beginners is whether it’s worth buying a quilting machine.
Personally, we would always recommend quilting with a machine if your budget allows it — they allow more creative freedom and are significantly faster than hand quilting.
Machine Quilting
Machine quilting is more versatile in terms of what stitches and materials you can use, and it moves things along very quickly. Most machines also have parts called feet that keep your stitches and seam allowances precise.
Not to mention, once you get a little more advanced, you can use a machine for what’s called free motion quilting – it basically means free-styling the quilting stage of the project to create your own designs with the stitches.
The downside? Machines need parts and servicing, and those costs can add up.
Quilting Machines vs Sewing/Quilting Machines
Quilting Machines
These tend to be larger machines, with a wider throat space and often an extension table to make it more conducive for large, flat projects. They make seeing your project much easier, especially during the quilting stage, and they create gorgeous, sturdy quilts. They are built with high durability, for stitching through thick layers.
The downsides are that they tend to be pricy, a lot of them require you to work standing up, and you can’t use them for much other than quilting.
Sewing and Quilting Machines
These are more general purpose sewing machines with capabilities built in to make quilting a little easier, such as a needle/up down control. They are generally much more compact and include features – like lots of fancy built-in stitches – that you don’t necessarily need for quilting but may for other sewing projects.
A regular sewing machine can cost you just about anywhere between two and four figures.
Hand Quilting
Hand quilting has its ups and downs too.
Expert hand-quilters recommend steering clear of certain fabrics (like silk and batik) and higher loft (fluffier) batting for these projects, so they are a bit restrictive.
On the plus side, hand quilting is gentler on older fabrics and it can give your finished product a softer look.
Plus, for a lot of quilters, there’s something really special about stepping back to look at your work and knowing that you did it all by hand.
Quilting Machine Brands
Many a crafter has striven to answer the question of what the best machine for quilting is. Here are some of the contenders:
- Juki: extremely durable and easy to use, with good features for quilting, but on the pricey side and not very general purpose-friendly.
- Janome: high-tech, reliable, and a good value for your money, but doesn’t include as many features as other brands.
- Brother: lightweight and good for beginners, with a wide price range to fit any budget.
- Singer: a good range of machines for different skill levels, with their main selling point being affordable prices.
- Husqvarna/Viking: innovative design and controls, with a wide price range, but can be difficult to find.
- Bernina: a family owned company with good features for both quilting and general purpose, but very costly.
Best Quilting Machines
All of the machines we’ve got for you here have been personally tested by us and carry our seal of approval.
Generally, when it comes to sewing and quilting machines, you get what you pay for — but we’ve got 5 machines here that will suit an array of budgets.
Let’s take it away…
Brother XR3774 Full Featured Sewing and Quilting Machine

We think this is one of the best low cost sewing and quilting machines on the market right now.
It’s from Brother, so you know it’s got a good pedigree behind it, and it’s remarkably versatile considering its low price point.
Pros
- Comes with 37 stitches
- Includes a wide table for quilting
- Comes with a quilting foot (plus 7 other feet)
- Easy to use: has an automatic needle threader and jam resistant top drop-in bobbin
- Beautiful design
- Brightly lit workspace
- Low price
Cons
- The throat space is a little small compared to more expensive machines
- It works quite noisily
![]()
Singer 9960 Quantum Stylist

This is actually one of our favorite sewing machines of 2017, but it’s also great for quilting too — we use it all the time!
It has a huge number of built-in stitches and a luxuriously large extension table, as well as a host of other high-tech features.
It’s got a mid market price, but is undeniably an incredible machine.
Pros
- Comes with 600 pre-programmed stitches, including buttonholes and fonts
- Computerized with a Digital Information Advisor and electronic auto pilot
- Incredible versatile — good for sewing, clothes making, quilting and embroidery
- Lots of creative freedom
- Huge extension table
- Automatic needle threader, thread cutter, stitch length and width, and a top drop-in bobbin system
- Needle/up down button — great for quilting
- Comes with 18 presser feet and lots of other accessories
- Speed control lever
Cons
- It might be a little overwhelming for beginners
![]()
Brother PQ1500SL High Speed Quilting and Sewing Machine

This is another Brother quilting machine, but it’s more than a few steps up from the XR3774 (with a price tag to reflect that).
It does exactly what it says on the tin: high speed quilting — and sewing too! No wonder it’s one of the darlings of the quilting machines world.
Pros
- Sews up to 1500 stitches per minute
- Easy to use — comes with push button automatic thread trimmer, needle threader, needle positioner and knee lever for the presser foot lift
- Allows you lots of creative freedom with a retractable drop feed dog control
- Comes with a 12″ x 18″ extension table
- Large throat space
- Comes with lots of presser feet, including free motion quilt foot
- Sews any fabric like a dream
- Very sturdy and durable
Cons
- A learning curve to master
- Not portable
![]()
Juki TL-2010Q 1-Needle Lockstitch Sewing Machine

Juki are well known for their impeccable machines, and this is one of the best on the market for quilting.
Beginners should look elsewhere: only the experienced need apply. But you will reap the rewards of an incredibly sophisticated and high quality machine.
Pros
- Huge throat area
- High speed at 1,500 stitches per minute
- Comes with sliding speed control
- One pedal foot control
- Large extension table included
- Exquisite lockstitch stitching
- Built-in carry handle
- Sturdy and durable
Cons
- Expensive
- Requires regular oiling
- Not as versatile as other machines
![]()
Janome MC-6300P Computerized Quilting Sewing Machine

Like Juki, Janome is another heavyweight in the sewing and quilting machine world.
This machine is very expensive, but is just as good as the Juki with an added dollop of versatility. We think it’s of a professional quality — the sewing is consistently excellent and it can handle practically anything.
Pros
- Pre-programmed with 66 stitches and 4 buttonholes (include hand look quilt stitch)
- Computerized with intuitive LCD screen
- Easy to use with automatic thread cutter
- Memory capability
- Comes with a knee lifter and drop feed control for lots of creative freedom
- High speed at 1,000 stitches per minute, with speed control
- Large throat space
- Advanced feed mechanism for thick materials
Cons
- Expensive
- Overwhelming for beginners
![]()
What Other Materials/Tools Do You Need?
As a crafter, it never hurts to have some helpful odds and ends around, just in case.
- Seam Ripper: mistakes happen. This tool will help you rip out work you’ve already done so that you can take another shot at it.
- Sewing Scissors: it’s good to always have a pair on hand!
- Betweens: these are smaller needles with a rounded eye that make hand quilting in heavy fabric easier.
- Extra Machine Needles: it’s a good idea to replace them after each project. You can buy ones specifically for quilting, but a standard, universal one works just fine as well.
- Chalk Pencils: so that you can mark up your fabric with important lines and measurements, and wash the marks off later. Invisible ink pens work well too.
- Curved Safety Pins: these are great for holding your sandwich layers together while you’re stitching them up.
- Thimble: accidentally stabbing yourself is no fun, and it happens more than you’d think.
Quilt Patterns: Where to Find Them
Finding quilt patterns (or even better free quilt patterns!) isn’t hard if you’re prepared to dive into the internet.
Here are the main places that we look for quilting patterns:
And, of course, take a look at our Quilting board on Pinterest for inspiration too!
And that’s all you need to know about how to make a quilt!


