
Do you like taking photos? Have you ever wondered how to take great photos?
We’ve compiled this comprehensive guide to photography for beginners to help you do just that.
Photography is a huge part of modern culture and can the most rewarding hobby. The internet has great platforms for all aspects of photography; especially with apps such as Instagram and Pinterest, photo sharing couldn’t be easier.
But what makes a good photograph? If you have considered photography before, then you may be aware of all the jargon, and something simple such as capturing a beautiful sunset can suddenly become quite complicated.
If you’ve never been confident in taking pictures and would like to start your journey in photography, you’ve come to the right place. We’ve got all the information you need to for basic photography.
Equally, if you are already familiar with photography but you would like take your photos to the next level and enhance your photography skills, here are some important tips to consider…
Different Types of Camera
First things first, you need to get the right equipment.
There are so many different cameras available and it’s often very difficult to know which one is best for you.
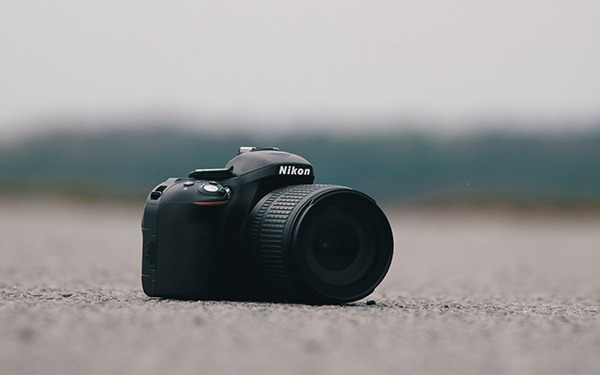
Photo by 2Curious on Unsplash
In this section, we’ll be exploring all the different types of cameras and their functions.
DSLR
These are the most popular type of cameras for photography and you will find that many photographers choose a DSLR camera as their main companion.
DSLR cameras are designed to give superb image quality, making them the ideal choice for amateur and professional photographers.
They offer interchangeable lenses and an array of creative controls, so you can capture a range of original photographs.
It is important to note that DSLR cameras can be very expensive. Although you get great quality images from these cameras, they are often usually quite heavy and bulky too.
Compact System (Mirrorless) Cameras
These cameras are becoming extremely popular with professional and beginner photographers.
Compact system (mirrorless) cameras benefit from having interchangeable lenses, which means greater control for the photographer.
They offer most of the features and capabilities of DSLR cameras, but with the added benefit of being lightweight, smaller, and generally cheaper in price.
These cameras are a great option for hobby photographers who want to extend the control over their photos but don’t want the hassle of having to carry heavy sets of full-sized lenses.
Standard Compact
Standard compact cameras are usually small, light, and fairly cheap.
These cameras are also known as point-and-shoots and are the basic entry model for digital photography.
They are normally fully automatic; however, you can get some models that offer manual exposure options.
These cameras usually have a zoom lens which folds into the camera, a built-in flash, and an LCD screen on the back rather than an eye viewfinder.
Some standard compacts have additional features such as HD video recording and Wi-Fi connectivity for instant upload on social media platforms.
Although these cameras are inexpensive, they are a very basic option and don’t always provide a great quality image for professional use.
Advanced Compact
Advanced compact cameras are designed for more experienced photographers or for individuals who require more versatility, quality, and creative features.
Options such as manual exposure mode, manual focusing features, optical viewfinders, and external flash connections make these cameras a good option for photographers who want control over their photos.
However, these cameras are usually more expensive than other point and shoots.
Adventure Cameras
These cameras are very similar to compact cameras, but they are designed specifically for adventurers!
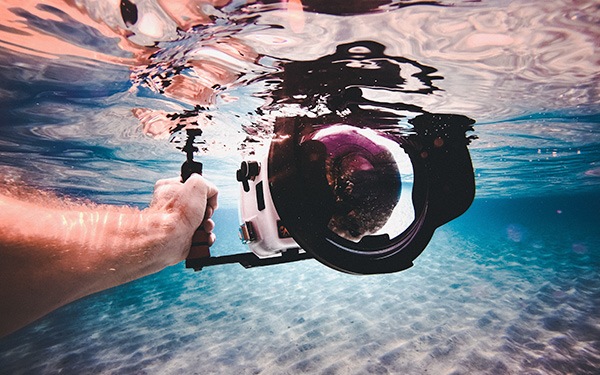
Photo by Jakob Owens on Unsplash
They are usually waterproof, shockproof, and some recent models have proven to be freeze-proof.
These cameras generally come with standard manual exposure options and can zoom closer than standard compacts.
This is a good option for a beginner wanting to take pictures whatever the weather, and whatever the location.
Automatic vs Manual Settings
If you are starting off in photography, then it is important to know the main differences between the two main settings: automatic and manual.
The way an image is captured can be entirely defined by these two settings.
This section will explain the difference between the two settings, how and when to use them, and which one is best for your photographs.
Automatic Shooting Modes
Most cameras come with a few different types of shooting modes, from full automatic to full manual.
An automatic shooting mode takes care of everything for you and there isn’t much work involved.
This mode can be useful for beginners but doesn’t allow much control over the photograph – so you are limited to what you can do with an image.
- Program automatic sets your aperture and shutter speed automatically, but also allows you the control over other settings such as the ISO – the rating that affects how sensitive your camera’s sensor is to light.
- Within automatic shooting modes, you also have an option for automatic scene modes. These settings usually have icons to represent their purpose, such as a mountain for landscapes or a fast-moving person for sports. Scene modes can be useful if you want the camera to assist you in photographing different types of photos.
- Shutter priority allows you to set the shutter speed and ISO, but allows the camera to set the aperture automatically. This mode is useful when you want to make sure you take a photo fast enough to capture motion. It is especially useful for taking photographs of anything with a lot of movement.
- Aperture priority allows you to set the aperture and ISO, but lets the camera set the shutter speed automatically. The aperture can have some of the greatest visual impact on your photographs because it is one of the largest contributing factors to depth of field. A wide aperture is useful for portraits as it will put your subject in sharp focus, concentrating on a single object in a busy frame. Wider apertures also let in more light, so they’re useful when you don’t have much natural light and want to avoid using a flash. A narrow aperture is useful for landscapes, where keeping everything in focus is desirable.
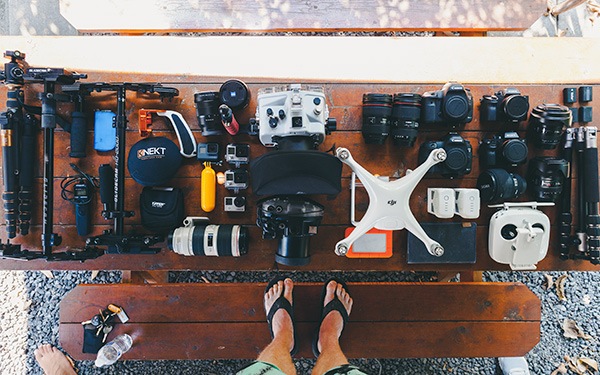
Photo by Jakob Owens on Unsplash
Automatic Flash Modes
There are various different automatic flash modes, here is a brief description of what each mode can do:
- Automatic flash will only use the flash when needed. This usually happens when there isn’t enough light anywhere in the frame or if the subject is backlit and appears dark to the camera.
- Automatic flash with red eye reduction works the same as the regular automatic flash mode, but reduces the red eye effect that flashes often produce.
- Forced/Fill-in flash means the flash will be used with every exposure regardless of whether or not the camera believes it’s necessary. This is the mode you choose when you know you’re always going to need the flash.
- Slow shutter flash (with red-eye reduction) should be used in a very low light situation, as the shutter speed will be reduced and the flash offers repeated bursts of light to compensate. With the automatic mode, the camera will determine when this is necessary and do it automatically.
Photo by Elly Brian on Unsplash
Manual Settings
With manual settings, you adjust everything yourself (except ISO, if you set it to automatic), so you have to think about all three of these settings before you take a photograph.
This can be quite a daunting concept, especially for a beginner, but once you know which setting to prioritize with each type of photograph, manual settings can be fairly easy to navigate.
The easiest way to decide which setting you need, is to ask yourself the following questions:
Do you want to ensure a shallow depth of field? If so, your priority is your aperture. When you adjust your aperture settings, you’ll see that opening get bigger and smaller. The larger the opening, or wider the aperture, you allow more light with each exposure. The smaller the opening, or narrower the aperture, the less light can be allowed in. Using a wide aperture is generally considered the best method for taking in more light.
Next, you should ask yourself if you want to prevent as much motion blur as possible. For this, you should concentrate on shutter speed first. Once you know your priority, all you need to do is set the other settings to whatever is necessary to expose the right amount of light to the photograph.
With manual settings, your camera should let you know if you’re over or underexposed by providing a little meter at the bottom. The left is underexposed and the right is overexposed. Your goal is to get the pointer in the middle.
Once you have the right balance, you should create professional and flawless photographs!
For photography for beginners, it is useful to start with automatic settings, as this gets you used to the different aspects of an image. Once you have mastered the automatic modes and feel comfortable managing your options personally, you should try using manual settings for greater control.
Here’s a great video of mastering the basics of manual photography:
Photo Composition
Although there are no fixed rules in photography, there are some things that can help enhance your images.
The term composition is used to describe how you capture objects in your picture.
By keeping these tips in mind, it will help you take more compelling photographs, by drawing attention to the important parts and leading the viewer’s eye through the image, enhancing the overall impact of a scene.
Rule of Thirds
Imagine that your image is divided into nine equal segments.
The rule of thirds says that you should position the most important elements in the scene along these lines, or at the points where they cross.
By doing this, it will add balance to the image.
Many DSLR and point and shoot cameras will have an option for a 3×3 grid to be laid over the screen to give you some guidance on this point.
Balancing Elements
By placing your main subject off-center with the rule of thirds, it can often leave a blank space, making the image feel empty.
It is important to balance the “weight” of your image by including another object to fill the space.
Photo by adrian on Unsplash
Symmetry and Patterns
Symmetry and patterns can make for very eye-catching compositions, particularly in situations where they are not expected. Another great way to use them is to break the symmetry or pattern, which can add a focal point to the image.
Viewpoint
Before taking a picture, it is important to consider where you will shoot it from.
Viewpoint can have a great impact on an image, so rather than just shooting from eye level, consider photographing from high above, down at ground level, from the side, from the back or from a long way away.
Conclusion
There are several things you can do to become an expert photographer, but the best way to become an expert is to practice.
Take your camera wherever you go and take as many pictures as you can!
Are you getting started with photography for beginners?


