
Everyone can recall that part of their childhood where friendship bracelets were all the rage.
If you want to revisit those good old days, or just rock the bracelets of your youth, you can easily make your own friendship bracelets!
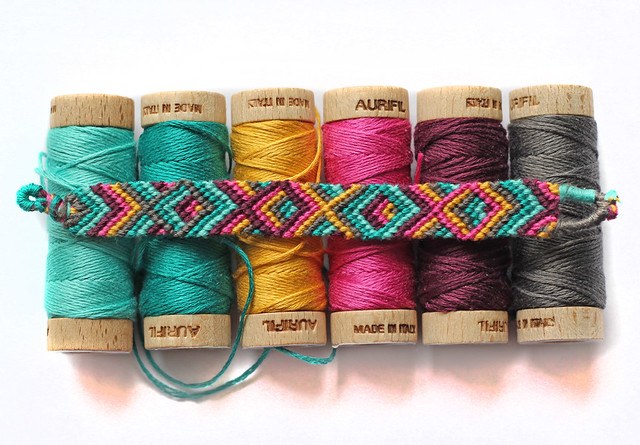
By Katarina Roccella (Creative Commons Attribution-Share Alike 2.0 licence)
Where did this type of jewelry originate, and how can you make the most dazzling kind? Let’s dive into all that and more.
Contents
History and Origin
Friendship bracelets are a type of string bracelet that friends exchange as a symbol of their relationship.
Commonly, Native Americans are credited with developing traditional friendship bracelets. On the other hand, they may have come from Central America. In any case, they were popularized again in the U.S. during the 1970s.
String bracelets, especially friendship bracelets, are a type of macramé. A macramé is a fabric craft that uses knots to create patterns; if you simply can’t get the hang of knitting and crochet, this may be the fabric craft for you!
Friendship Bracelets vs. Normal Bracelets
Nowadays, there isn’t a difference between a friendship bracelet and an ordinary bracelet.
All that matters is that friendship bracelets are made for friends. It doesn’t even have to be a string bracelet or specifically woven!
However, string bracelets tend to be more durable than any other material. If you want to make friendship bracelets, you can easily learn how to make string bracelets and give them to a friend. Speaking of…
How to Make Friendship Bracelets
With a bit of practice, you’ll be making friendship bracelets by the dozen in no time. All that’s necessary are a few materials and a pattern.
Materials
Embroidery Floss
Never forget the embroidery floss! This material doesn’t need to be fancy or expensive—just make sure you have the six-stranded type.
This is just the right number of strands for a bracelet, as any thicker or thinner will make it unwieldy.
Pins or Tape
While not completely necessary, pins or tape are great for keeping your bracelet in place. Keep these on hand if you’re creating a long bracelet or one that uses many threads.
Patterns
While there are many friendship bracelet patterns to be found online, the following are well-loved classics.
Once you have mastered these basic patterns, you can experiment and develop your own!
Candy Stripe Pattern
Also called the diagonal stripe pattern, this design consists of different thread colors alternating in a diagonal stripe, so it looks like the stripes in candy!
This pattern can be made with any number of threads, so long as it’s an even number. In this tutorial, we’ll use six strands.
- Measure Out Your Floss
How long should your floss be?
For this pattern, measure out the circumference of your wrist (or the wrist of the person you’re giving it to), and multiply it by five.
If you are adding more strands to your bracelet, include six extra inches for each strand. Because you’ll be adding more knots with each color, the more colors you have, the quicker you will run through each.
- Create an Overhead Knot
To secure your bracelet, create an overhand knot with all the strands.
An overhand knot is a simple task; starting three inches from the top, form a loop with the strands and pass the shorter end through the loop.
Pin or tape this knot to a sturdy surface, like a table or your pants leg!
- Create a Braided Section
This first braided section is used to tie your bracelet closed. Starting from the overhead knot, create a simple braid that is about three inches in length.
For those using six strands, create groups of two to result in three total groups. Finish the braid with another overhead knot.

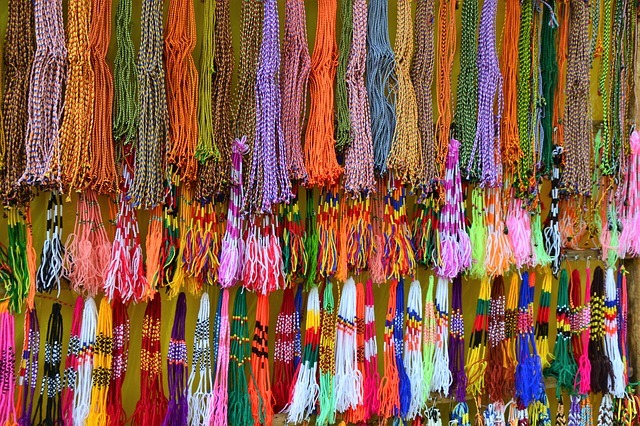
By Virginie Fortin-DaPozzo (Creative Commons Attribution-Share Alike 2.0 licence)
- Tie the First Knot
Take your leftmost strand. Pass it over, then behind the strand to its right, forming a loop. Pass the end of the first strand through this loop and create a knot.
Pull on the second strand downward, while pulling the first strand upward. This will secure your knot to just the edge of your overhead knot. Be sure to tie this knot above the second strand to achieve the right look.
- Continue Knotting With the First Strand
Now that you’ve tied your first knot, your first strand should be jutting from the top of the second strand. Pull it downward. Then, tie a knot over the third strand, repeating this with the second.
Move the first strand over and behind the third, passing the end of the strand through the loop.
Repeat this with the other strands until you have knotted over the last strand. At this point, you’ve made your first diagonal!
- Knot With the Second Strand
After finishing your first diagonal, the strand to your far-left should be the second strand. Meanwhile, the strand to your far-right should be the first.
Take your second strand, now the left-most strand, and repeat the process taken with the first strand.
- Continue Knotting With the Rest of the Strands
After finishing this second diagonal, return to the far-left strand and continue knotting.
Keep doing this until you have about three inches of thread left. Then, create an overhead knot.
- Create the Second Braided Section
You’re almost done with your bracelet! Now it’s time to create the second braided section, which will help you secure your bracelet.
This will be the same as the first braided section, with an overhead knot toward the end.
- Snip Off the Extra Strands
To make a neater bracelet, snip off the excess thread on both ends.
- Put On Your Friendship Bracelet!
Congratulations! You now have a friendship bracelet. You can put this on your wrist, or give it to a friend.
Use the braided sections to tie the bracelet closed.
Here’s a video showing an example of a striped friendship bracelet.
Chevron Pattern
The chevron pattern is a slight deviation from the candy stripe pattern. For this design, you’ll need different colors for each strand.
Also, prepare your floss so that each strand is mirrored from the center; you will have the same colors on the left and right sides of your bracelet, so that you can create a chevron.
- Measure Your Floss
In this pattern, we measure our floss exactly as we did for the candy stripe pattern. However, this time, we’re doubling the measurement.
- Create an Overhead Knot
Now, take your floss and then fold the stands in half. Place a pin through the loop you’ve just created, or tape it flat.
Then, an inch from the loop, create an overhead knot. After that, arrange the strands accordingly.
- Create the Braided Section
After arranging the strands, braid about three inches before creating another overhead knot.
- Create the Left Knots
This first knot is similar to the candy stripe pattern. Take your first strand, loop it around the second, and create a knot. Then, keep going until you have reached the center of your bracelet.
This will be the number of strands equal to the number of threads you started with (before you folded your floss in half.)
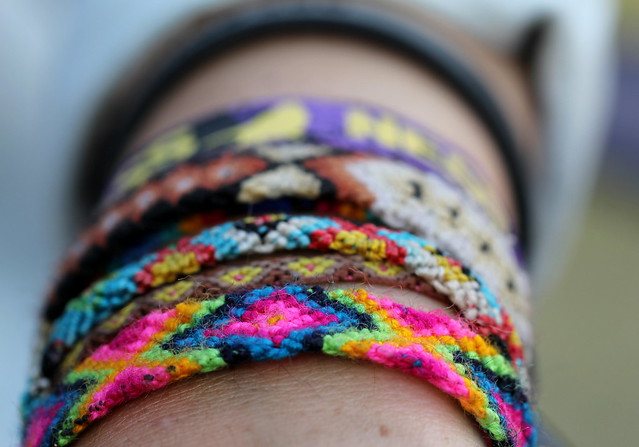
By Cory Denton (Creative Commons Attribution-Share Alike 2.0 licence)
- Create the Right Knots
Now, take the strand on your far-right, and create a knot over the strand to its left. Keep going until you have reached the center.
At this point, you should see your first chevron. This first chevron will be more bunched up, because it’s closer to the edge; the subsequent knots will make clearer chevrons.
- Repeat Steps 4 and 5
Keep repeating steps four and five, starting from the far-left and far-right strands. The farther you are to the ends of the bracelet, the clearer the pattern will be.
Stop knotting about three inches from the end of your thread, and create an overhead knot.
- Create a Closing Braid
Create a closing braid about three inches in length, and then close with an overhead knot.
Diamond Pattern
If you have the hang of that chevron pattern, you can make the diamond pattern as well.
This pattern is a set of normal chevrons, followed by a set of inverted chevrons.
- Measure Your Floss
For this pattern, use the same measurements as those in the chevron pattern.
- Create an Overhead Knot
We will also be creating the overhead knot exactly as we did with the chevron pattern.
- Create the Braided Section
The braided section will also be similar to the chevron pattern.
- Create a Set of Chevrons
To begin your pattern, create some rows of chevrons. The number of chevrons should be equal to the number of colors you have.
When you have the hang of this pattern, you can begin with inverted chevrons. For now, we will start with the normal kind.
- Begin With Your Inverted Chevron
To create the first knot of your inverted chevron, find the center of your bracelet. This is located where both strands of the same color are next to each other.
Take these same-colored strands and tie a knot (the same knot you used for your candy stripe pattern) over each.
Now, take the same-colored strand to the right. Tie knots using the candy stripe pattern over the strand to its right. Keep going until you reach the edge.
Do the same thing for the same-colored strand to the left; only, this time, tie knots over the strands to its left. After doing this, you will have one strand of inverted chevrons.
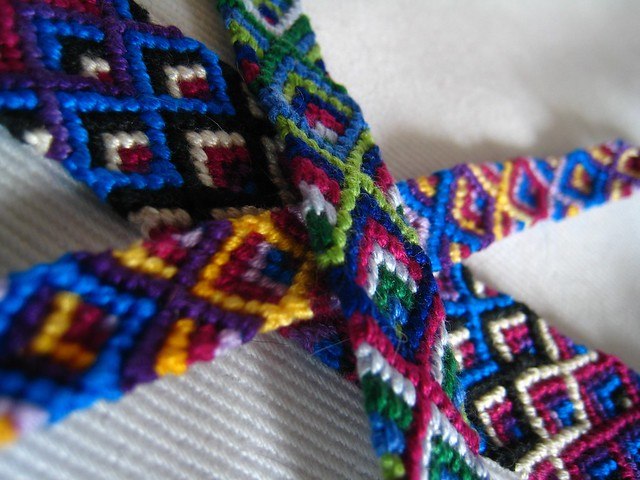
By Traci Lawson (Creative Commons Attribution-Share Alike 2.0 licence)
- Create More Inverted Chevrons
Now, create more inverted chevrons until you have used all the colors.
- Create a Diamond
After going through all the colors, you will now be back to the color you first used. (This should be two strands with the same color that are next to each other.)
Take one of these strands, and make a knot with the other strand (similar to how you started your inverted chevron).
Now, take the right strand of this color, and make a knot over the thread to its right. Take the left strand of this color, and make a knot over the thread to its left.
Next, take either strand and tie a knot in the center. You should now have created a diamond.
- Continue With a Chevron
Now, create a chevron. The chevron should be wrapping around the bottom of the diamond.
Keep making a chevron until you have gone through half the strands. (For example, if you have four colors and four strands, make two chevrons.)
- Start the Half Diamond
This part of the design will look like two diamonds cut at the center, beside each other. This will be incomplete chevrons.
Starting from the edges, tie one less knot toward the center. (For example, if you have four colors, tie three knots.)
Then, return to the edges, and tie two fewer knots towards the center. (If you have four colors, tie two knots.) Keep going until you tie one knot; this will be the center of your half-diamond.
- End the Half Diamond
Now, we’re going to take our incomplete chevrons and wrap them around the center of the half-diamond.
Start with the incomplete chevrons from the middle (this will be the strands above the half diamonds). Create knots towards the outside of your bracelet. This should create inverse chevrons.
Keep going until all incomplete chevrons are completed.
- Repeat Steps 7 to 10
Continue making diamonds, chevrons, half-diamonds, and inverted chevrons, in that order.
Keep going until you have about three inches of floss left. Then, create an overhead knot.
- Create a Braid to End Your Bracelet
After braiding, create another overhead knot.
There you have it! Your chevron-patterned friendship bracelet.
This video shows an example of a diamond friendship bracelet pattern.
Making Your Bracelets Lay Flat
While knotting your bracelet, you may notice it curling up. Pinning or taping your bracelet down will keep your bracelet taut even if it begins to curl.
However, when you’re done with your bracelet, you may notice that it’s still curling.
To fix this, you can do something called ‘blocking.’ To block your bracelet, pull it taut and keep it in place with tape or pins. Then, soak it with water. Let it dry.
The water will relax the fibers and make your bracelet flexible when dry.
The first bracelets you make can be weird and wonky, but practice will easily fix that. After all, what’s too much work for a friend? Get your thread, call up a friend, and get knotting.
What are your favorite friendship bracelet patterns?


