
Handmade earrings make a wonderful gift and provide a creative way to accessorize.
There are many methods for making earrings. All of them require supplies that you can find at your local craft store.
If you’re looking to dive into the hobby, then you’ve come to the right place; we have all the tips and tricks you need right here.
Contents
How To Make Earrings
For every type of earring listed below, it pays to clean your earrings before wearing them. You can do this with rubbing alcohol or with a specialty jewelry cleaner that will be available at your local craft store.
Use cotton swabs or rounds to make sure that the posts or hooks are sterile and dry. If you are allergic to certain metals, make sure that you are buying hooks or wires that won’t irritate your ears.
Earring Making Supplies
A big part of DIY earring-making is the beads you use. These are going to be what really stand out and make your piece unique.
Your earrings can be made of beads, small pearls, ribbons, rhinestones, or anything you can think of. If you have polymer clay, you can use that to form small studs that will be truly unique (just make sure to properly bake and cool your creations first).
So long as they don’t weigh down your earlobes too much, the sky is the limit. You can even use found objects such as buttons or shells.
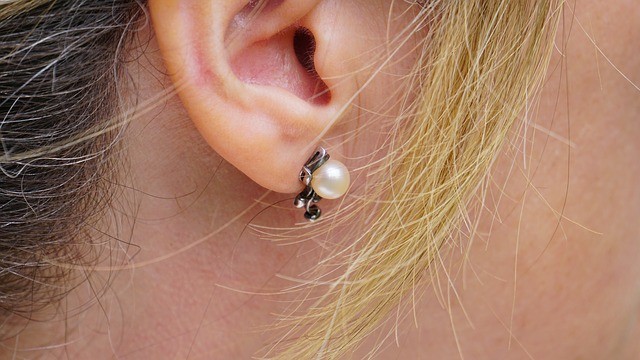
How to Make Stud Earrings
Studs provide a simple, minimalist statement. For the base of your stud earrings, you’ll want to start with the basics: stud-style posts and some kind of backing. Butterfly backings are the most common and comfortable.
You’ll also want a strong glue. You can use super glue or a specialty jewelry glue from your craft store, but whatever type you use, make sure to read the instructions for safely applying and drying it.
The final supply you’ll need is whatever you want to attach to your studs, such as beads or buttons.
First, sanitize your stud posts; this is pretty simple. Now you can let your creativity run wild!
Attach your objects to the posts with your glue, and then carefully set them to dry.
Depending on what kind of glue you’ve used, completely drying may take anywhere from an hour to overnight, so it’s best to let them set for a long time.
How to Make Beaded Earrings
For beaded earrings, you’ll need a different type of post. Likely you’ll want a French hook, which fits into your earlobe by curving itself.
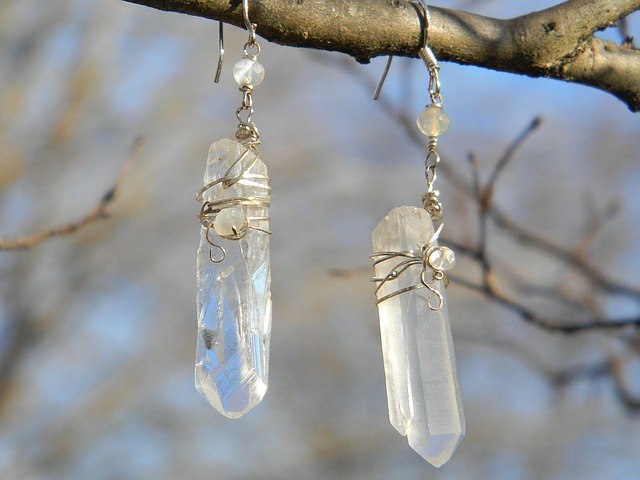
You can buy these at any arts supply store, and they make fine hooks for your beaded earrings. You’ll also want headpins, beads, and round-nosed pliers.
First, sanitize your hooks.
The next step: stringing the beads onto the headpin. You can get creative here in the contrast between size and color. This is a great method to showcase any especially pretty beads you want to use.
Since this is such a customizable way of making earrings, you might want to plan out your designs ahead of time to create interesting patterns or shapes.
Make the string of beads as long as you’d like your earring to be. Then, use your needle-nosed pliers to cut the end of the headpin so that only a centimetre of empty headpin remains.
Next, use your pliers to ease the remaining centimetre into a loop shape. This should be a small, tight circle or oval, but with enough space to fit in your earring hook.
Slip the tiny loop on the end of your earring hook onto the headpin. Once it is situated, use your pliers to crimp the headpin into a tight loop.
Make sure it’s tight enough that it won’t fall off the earring hook. Repeat the process with your second earring, and you’re all done!
How to Make Hoop Earrings
For DIY hoop earrings, you don’t need to buy specialty posts or hooks. Instead, you’ll use a segment of craft wire to form the entire piece of jewelry.
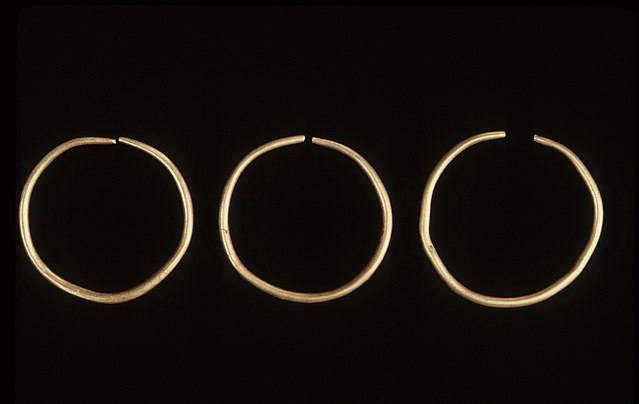
You’ll need jewelry wire for this, either 20-gauge or 1mm wire of a high jewelry quality. Make sure to sanitize it before wearing.
You’ll also need round-nosed pliers, something to cut the wire with, and a nail file to shore down any loose edges. You also need a dowel or cylindrical object to wrap your hoops around. This dowel should have the same diameter as you want your hoops to be.
Finally, you’ll have the option to put beads on your hoop earrings, so gather some if you wish to do this. It’s a good idea to test them beforehand to make sure they’ll fit on your wire, as beads come in all different sizes.
To form your earrings, first make a small loop around the tip of your round-nosed pliers. Once this is done, shape the rest of the wire around your dowel so that it forms a complete loop.
Slide this off of the dowel and trim it so that the end of your hoop goes just past the small loop. Now file this end so that it can go into an ear piercing hole without causing irritation.
That’s it! You’ve created a simple hoop earring that you can now decorate with beads or wear plain for a simple fashion statement. You can create the second earring in an identical manner.
If you’re feeling really adventurous, the video below shows to make tassel earrings.
Have you tried making earrings?


