
Glass blowing is one of the oldest, most unique art forms in the world—and if you ask us, it’s also one of the coolest.
You may have seen glass blowing displays or studios in your city or while travelling.
The question is, do you need lessons at one of these studios in order to make awesome glass creations?
Maybe not.
Wherever you do your crafting, you’ll need to know the basics and have a good set of materials at the ready before you get started at home.
Here’s our complete guide to the art of glass blowing…
Contents
What is Glass Blowing?
Glass blowing is just what it sounds like: a procedure that mostly consists of blowing air through a tube in order to form molten glass into various objects.
Humans have been doing this since glass blowing was invented in Syria, 2000 years ago.
For most of that time, only select people had the knowledge or tools necessary to make glassware.
Luckily, in the 1960s, the American Studio Glass Movement made it more widely available in universities and even some studios that are open to the public.
What Can You Make?
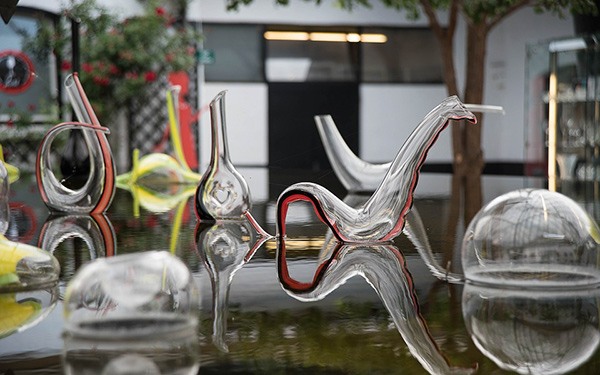
The sky is the limit, once you’ve got all the right glass blowing supplies and some experience under your belt.
Many glass blowing artists use this process to create stunning combinations of shapes and colors.
For beginners, the best projects tend to be rounded objects, like spherical ornaments and cylindrical jars, since more squiggly or angular shapes can be tricky to get the hang of.
Glass Blowing Tools
Before you get started, you’ll need to get your hands on the tools of the trade.
Glassblowing is complex and can be dangerous if the glass blower (also called a gaffer) is careless.
There is a lot of equipment needed in order to make sure your glass blowing experience is safe and successful.
Materials
- Glass: Molten glass is made of purified sand, which is also called silica. With some searching, you can find it for sale, but a lot of gaffers who work at home prefer to simply melt recycled glass.
- Fluxes: Extra ingredients, such as natron, added to the glass in order to stiffen it and lower the melting point, making it easier to work with.
Furnaces
- Furnace: The first and main furnace usually contains a crucible of molten glass.
- Glory Hole: This furnace is used for reheating the glass when it cools and becomes too stiff to work with.
- Annealer: A kiln that the glassware is put into once it is done being shaped. This helps it to cool gradually and prevents it from being brittle afterward.
Sometimes, a blow torch is also used to heat the glass. This can be used for smaller, more detailed work, once the glass is already out of the furnace.

In a pinch, a torch can be used for the main source of heat, rather than a furnace—but more on that later.
Glass Blowing Supplies
- Pipe: A long metal tube used for gathering molten glass and blowing air into it.
- Marver: A steel, brass or graphite tool on which you can shape the warm glass
- Pyrometer: A device used to monitor the temperature of kilns and furnaces.
- Steam Stick and Puffer: These are both devices used to expand the glass once it is taken off the pipe. A steam stick is made of wood and has to be wet in order to be used. The water prevents the heat of the molten glass from setting the wood on fire, and also expands the glass by turning into steam inside it. A gaffer can also use a puffer to expand the glass by blowing air through it, similar to the pipe.
- Jacks: A bladed tool used to shape the side walls of the glass.
- Shears: The two main types are straight shears and diamond shears. They are used to constrict and cut the glass while it is still soft.
- Pontil: Another medal rod. The glass piece is attached to this one at the base once it is taken off the first pipe, so that the mouth can be shaped. It can also be used to attach additional pieces of glass to the one you’re working on while it’s still on the pipe.
- Tweezers: Just like the ones you keep in your bathroom, except huge. These are used to safely grab the glass and transfer it from the pipe to the pontil.
- Safety Gear: Protective eyewear, heat resistant gloves, and closed toed shoes are all musts. If there’s anything you think might protect you from injury, it’s a good idea to bring it. With this much heavy equipment and molten glass, it’s always better to be safe than sorry.
Don’t be discouraged if the list of equipment seems a bit daunting.
Master gaffers have a huge array of equipment in their studios with them, to help them with diverse and challenging projects.
But when you’re just starting out, we recommend doing some research and finding out which tools will be necessary for your particular project and which ones you can see about later.

How to Blow Glass
Now that you’re an expert on glass blowing supplies, now’s the time to start using them!
The most traditional way to learn is to take glass blowing lessons or even find a job or apprenticeship at a studio near you.
But if that isn’t an option, or if you’d just rather do this in the comfort of your home, there are some choices available to you.
Here are the different ways you can get started glass blowing, and the steps it will involve.
Glass Blowing in a Studio
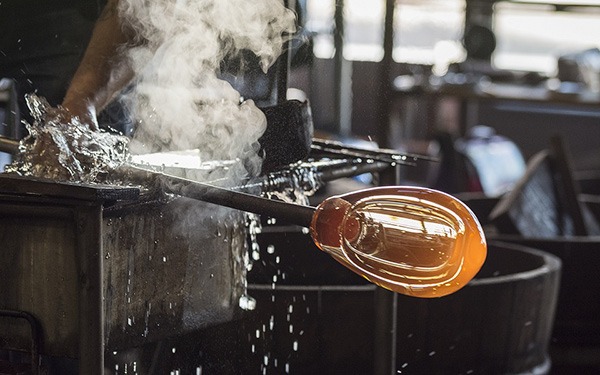
Gather
First, blow some air through the pipe to check for obstructions or hardened glass on the end.
When you’re sure it’s all clear, put the tip of the pipe into the glory hole furnace to heat it.
Warming the tip of the pipe before gathering will allow the molten glass to go onto the pipe evenly, without any bubbles.
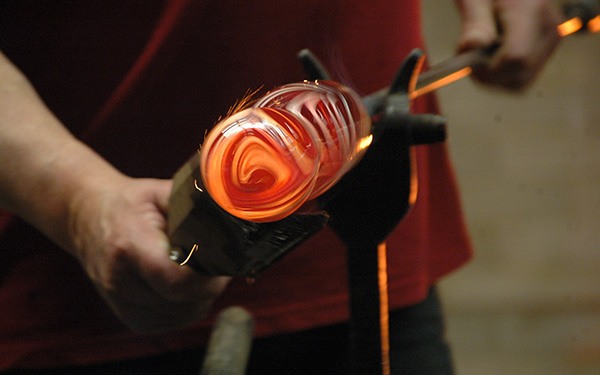
Once you have the tip of the pipe hot (but not too hot—it should be just starting to turn red), insert it into the crucible inside the main furnace and rotate it to get an even gathering of glass.
When you have your first layer of glass gathered on, you should make sure to keep the pipe rotating at all times.
Otherwise, gravity will do its thing and the gooey glass will sag downward.
You should also keep the pipe horizontal at waist level at all times, because this would probably be the worst possible time to accidentally whack someone in the head.
Using your mouth, carefully begin to blow air through the cool end of the pipe until the glass is expanded to the size you want.
It should feel like blowing a giant, molten bubble.
Shape
You can use the tools we listed earlier to shape the glass and add new pieces and colors to it.
You can also use wet, folded newspaper to shape the glass in whatever way you want, but make sure that the newspaper is well soaked and folded nice and thick, or else your hands and the paper will both burn.
While the glass piece is still on the pipe, you won’t be able to shape the mouth of it very much, since that’s where it’s attached.
When you’re ready to work on the mouth of the piece, you can transfer it to the pontil, attaching it at the base, and continue shaping.
When it’s all done, it should be fairly solid.
Use the flat side of the tweezers to give the pontil a good, solid tap and the piece will come right off. Just don’t let it fall to the floor!
Reheat
Glass blowing tends to be meticulous, so chances are the glass will start to cool and go solid again before you are done shaping it.
You need to keep the glass between 1500-1800 degrees Fahrenheit throughout the whole process, so when you feel like it’s cooled down too much, use the yolk in front of the glory hole to slide the pipe with the glass on it inside.
Remember to keep the pipe slowly rotating while you reheat it.
Anneal
Lastly, put your almost-finished piece of glassware into the annealing oven to let it cool slowly.
The purpose of this is to make sure that temperature of the surface of the glass is never too far from the temperature inside the glass, otherwise it will be strained and break easily at room temperature.
How long a piece needs to anneal depends on the composition and thickness of the glass used, among other factors.
This is another good thing to research or ask an expert about before you get started.
Check out this awesome YouTube tutorial on a flared inside-out spoon if you fancy a try:
Glass Blowing At Home
Glass blowing at home presents some challenges, but it can be done!
Here are some of the ways gaffers are able to work with glass from home.
Home Studio
If you are committed to making glass blowing your career, you can take the studio to your home.
This option will offer you the least limitations in the long run, but will be the most costly in terms of time and money.
Once you have a good-sized space set aside for your studio, you will need to gather your tools and equipment, including the furnaces.
There are small, electric furnaces available on some websites, and those are a good option for those who want to melt and shape glass in their homes, but even these will use up a lot of electricity.
We don’t suggest going this route unless you’re absolutely sure you’re okay with footing the bill for it.
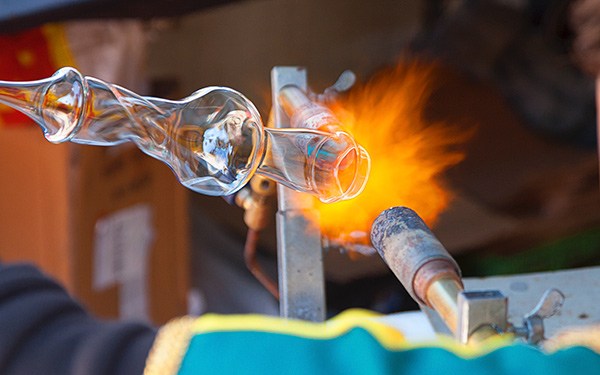
Lampworking
Remember when we said you can use a blow torch to heat and mold glass, rather than an entire furnace apparatus?
That process is called lampworking.
If you want to get into details, it’s not technically the same thing as glass blowing, since you don’t blow air into the glass this way, but it can be used for similar, smaller results, and is an easier alternative to do at home.
This is done using a smaller metal rod called a mandrel, which you flash in and out of the tip of the torch flame to gradually heat it.
You then do the same thing to a thin rod of solid glass until it is warm enough to move further into the flame without causing it to shatter.
When the tip of the glass rod is melted, it can be transferred, little by little, onto the mandrel, which you use to shape the glass, while rotating it, in similar ways to how the pipe or pontil is used in glass blowing.
Glass Blowing Kit
Some digging around on the internet will find you an array of home glassblowing kits.
Most of the ones available offer some combination of glass blowing and lampworking supplies, or much smaller versions of traditional glass blowing supplies.
Your options are still a bit limited with these, due to the small size and amount of supplies you get, but it is definitely the most convenient of the three options.
They do tend to be pricey though, so be sure to read the reviews and weigh your options before deciding on one.
Glass blowing is hard work, but it is also fun and incredibly satisfying once you get the hang of it and make something really cool.
We hope the rest of your glass blowing journey is just as awesome as the craft itself!


2 Comments
Pingback: My Homepage
I’ve always been really intrigued with glass blowing, and I think that knowing some more about it would be neat for me! I’m glad that you talked about a lot of glass blowing supplies, and all the different things you may need. My wife and I have been thinking about buying a quartz apparatus for sale used for glass blowing, and I think that being able to make sure we have all the other equipment would be really helpful! Thanks for the information!
I have been into glass since I was a boy with my first bag of marbles. It progressed over the next 50 years collecting art glass. Then I retired and I finally had the time to pursue it more in depth. I lucked out big time finding a shop 20 miles from my home. The owner introduced me into this wonderful world. My advice is find a teacher who will give you all the help and info you can handle. This is monumental. My teacher, Angelo has a way of taking me to the next level every week. He explains things to me so I can understand. He never tries to impress me, but encourage my thirst for learning this art. A word of advice, don’t show up to class waiting for your teacher to tell you what your going to make. Buy a sketch pad and come in each week with several designs you would like to try. Be prepared to explain to your teacher just how you are going to execute the piece. Then listen! I am very lucky to not only find such a talented teacher, but a shop where the people there all will offer help. Its amazing what you can pick up from people at all different skill levels. Never give up. If your serious about the art you will look back every week on the previous weeks and it will blow you away how far you have advanced. The final thing remember there is no limit on where you can take it. But find the right shop, teacher, and other glassblowers. Its a wonderful art to challenge yourself.