
If you’re looking for a new DIY project to delve into, then why not try glass painting? Creative, beautiful, and a bit niche, it serves as an excellent hobby or a neat expansion on traditional painting.
Whether you’re making a few paintings to spice up your home or gifting them to friends, with a bit of know-how, you can develop lovely works of art.
Where do you begin?
Let’s dive into what glass painting is, how a beginner like yourself can get started, and other helpful glass painting tips to perfect your art!
Contents
What is Glass Painting?
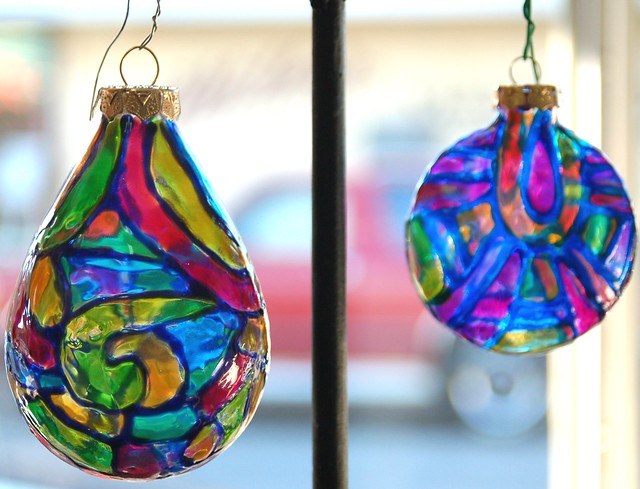
Simply put, glass painting is when you use various colors, brushes, and inks or paints to create lovely designs on glass.
Glass painting art is a contemporary version of stained-glass painting, which is when you arrange smaller pieces of glass together to form a colorful mosaic. However, rather than using separate glass pieces to form one whole picture, you paint on the glass itself.
It’s a popular hobby among children and adults alike, and there are endless items you can create, including:
- Unique wall hangings or pictures.
- Personalized wine glasses, cups, or mugs.
- Creative fish bowls or other pet habitats.
- Beautiful window art.
- Colorful tiles.
- Decorative mirrors.
To begin, all you need is a glass piece, a sheet of paper about the same size as the glass piece, glass paints, an outliner, and a design you like. There are plenty of water-based acrylic glass painting colors out there that are perfect for beginners!
In fact, glass painting is one of the more forgiving crafts you can explore. If you make a mistake while painting, carefully scrape it off with a paper knife after the paint has dried to fix it. You can also use cotton balls to wipe off any wet paint or outliner.
Glass paintings really shine in the sunlight, where the delicate rays can make your art look as if it’s glowing. Just make sure you don’t expose the paintings to too much sunlight, or you run the risk of the colors fading.
You can also frame your glass painting art in silver foil to reflect sunlight in a similar fashion. However, this is usually done when you can’t get enough light to illuminate your paintings.
Glass Painting Equipment and Materials
- Glass acrylic paint.
- Glass liquid leading. (This can come in black, silver, or gold.)
- Glass surface (sheets of glass, wine bottles, window panes, or any glass surface will do).
- Toothpicks.
- Cotton balls.
- Rubbing alcohol.
- Design you want to paint, printed on paper.
- Masking tape.
- Paintbrushes.
- Plate or palette to hold your paints.
Optional items:
- Glass glue.
- Suction cups.
Cleaning
Before you start, clean your glass surface with rubbing alcohol and cotton balls, so that your glass paints will stick properly.
Any oily residue left on the glass will make it difficult to keep the paint stuck to the surface. Using white spirit or nail polish remover works fairly well, too.
Paints
Glass paints can be either water or solvent-based. Try experimenting with both to see which kind you like best.
You can also use acrylic or oil paints, but keep in mind that oil paints take far longer to dry than most other glass paints.
Some paints may also need to be cured in an oven to dry, so read their labels carefully before you buy.
Liners
Glass liners are used to draw outlines for your glass art and can help to keep your colors inside these lines.
Brushes
You can use either synthetic or natural brushes for glass painting. While synthetic brushes are much cheaper, they are also more likely to leave behind glaring brush strokes on your artwork. ‘
Natural brushes, on the other hand, will be more expensive, but will give you the smoothest finish.
Glass Painting for Beginners
Beginners should always experiment with basic patterns, rather than diving straight into more complicated ones. As tempting as they may seem, it’s best to gradually build up your skills first.
You can draw your own patterns on paper, but if you’re not confident that your drawings will translate well to glass (or you’re feeling lazy), you can always find some great designs on the Internet.
- Slide your selected pattern underneath your glass surface. Feel free to freehand the design, too, if you want.
- Squeeze out some liquid leading onto a napkin, ensuring that the bottle isn’t clogged. Alternatively, your first bit of paint may also gush out in a huge glob, which can ruin your design if you’re not careful. It’s better for it to leak out on some paper than all over your hard work.
- Use your liquid leading to trace the outline of your desired pattern onto the glass. If you accidentally smear your leading, simply use a paper towel or napkin to wipe away the mistake before it dries.
- Store your glass surface in a safe place to dry for at least 12 hours.
- Squeeze your glass painting colors inside the outline, then spread the paint around with toothpicks. Bubbles may form in the paint as you spread it. Use the other end of your toothpick to pop them and continue spreading the paint. Make sure you fill in every part of the outline on the glass, even if it’s supposed to be a clear section (in which case, fill it up with clear paint). That way, your painting will have an even surface throughout.
- After you finish filling in your outline, let your paint dry for another 12 hours.
- If you want to hang your glass painting up on a window, dab glass glue on each corner of your painting. Then, stick your suction cups onto each corner and allow them to dry for as long as the bottle indicates (or even overnight).
- Finally, hang your new painting onto a window and watch the sunlight stream through it.
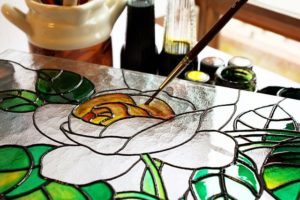
Here’s an example of a glass painting project.
Helpful Tips
Start with Angular Surfaces
When you first try glass painting, begin with a surface that uses many straight lines and angles, such as a flat glass sheet or a windowpane.
It’s much easier for you to trace your outlines on a flatter surface than a round one, after all. You should only move on to rounder surfaces like wine glasses or bottles when you’ve mastered painting on these flatter surfaces.
Paint Asymmetrical Shapes Around Your Designs
While you may feel self-conscious about only being able to paint simple objects at first, you can surround that object with a few asymmetrical shapes or colorful blobs of paint.
This will create a frame around your basic design and result in a more complex-looking painting.
Use Metallic Paints
Once you’re ready to paint on round or oval glass shapes, you can give them an extra-classy look by lining your creations with metallic paint.
This will result in an antique flair that other glass paintings may lack.
Use Black And White
If you want to create a snow-covered landscape, you can simply combine black and white paints to mimic this effect.
Feel free to dot your landscape with dark trees, rocks, and other fauna or flora, bringing your painting to life.
Be Careful of Where You Place Your Pattern
If you intend to eat or drink out of your glass piece, then you should paint the pattern on a spot where you know your food, drink, or mouth won’t be touching.
Even if your glass paint is non-toxic, it may still be unsafe for consumption.
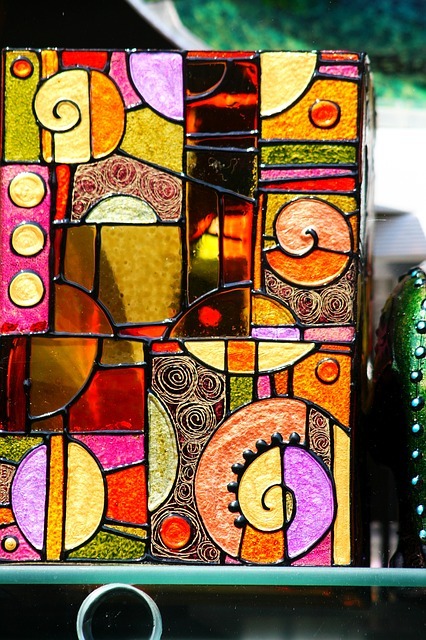
By Brett and Sue Coulstock (Creative Commons Attribution-Share Alike 2.0 licence)
Tape Your Outline to the Surface
If you’re painting on a flat glass surface, simply place your chosen pattern face down on one side of the glass. Then, tape the edges down with masking tape.
If you are painting on a round surface, put your pattern inside it, just under the spot you want to paint. Be sure you really press the paper outline against the wall before carefully taping it in place.
Don’t worry about any sticky residue the tape might leave behind. You can easily wash it off with your rubbing alcohol and a clean towel or napkin.
Pay Attention to the Borders
This is especially important if you want to frame your glass art. Be sure to choose a frame big enough, so it won’t cover up your beautiful design.
How to Create Smooth Outlines
When you use your glass liquid leading, remember to hold the tip just above the glass, rather than pressing it to the glass itself. This will prevent scrapes and streaks. Your outlines will also come out much thinner if they’re pressed flush.
Make sure your strokes are long and continuous, rather than short and choppy. Shorter lines tend to end up more uneven and will not look as nice.
When you’re done, feel free to repair any mistakes you’ve made. If you see lumps, just wipe them away with a Q-tip or a napkin dipped in rubbing alcohol.
If you notice a mistake long after the liquid leading has dried, you can simply scratch it off with a craft knife. Be very careful when you do this, or you might accidentally scratch the glass.
Make Sure Your Outline is Completely Dry Before Painting
Most glass liquid leadings take anywhere from six to eight hours to dry.
Just to be safe, you should always refer to the label on the bottle for a more specific drying time. Each brand of liquid leading will be different.
Keep Your Paint on a Plate or Palette
If your glass paint comes with a pointy tip, you can apply the paint directly onto the glass.
However, squeezing out your glass paint onto a plate or palette instead will give you far more control over the amount of paint you apply.
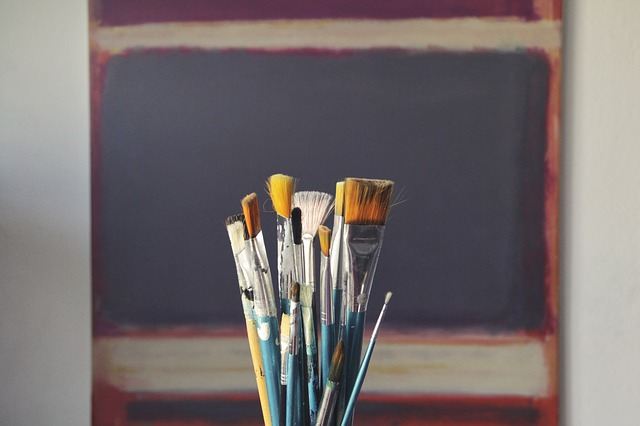
By mbtphoto (Creative Commons Attribution-Share Alike 2.0 licence)
Glide, Don’t Press
Pressing down too hard with your brush will wipe the existing paint off and ruin your piece. You need to let the paintbrush glide across your glass surface instead.
The thicker the coat of paint you lay down, the more it will level off. This will help to reduce the number of brush strokes.
If you notice that a layer is too thin, don’t go over it a second time. Instead, wait until it dries before you apply a second coat.
Paint as Close to the Outline as You Can
Because glass paint shrinks a bit after it dries, you will need to spread your paint all the way to the outline.
If you’re having any trouble with tight areas, just use a toothpick to spread the paint instead.
How to Swirl Colors
If you want to create a swirled color effect, place a few drops of two or more colors into one spot. Then, swirl them together with a toothpick.
Take care not to mix too much, or you could end up with a solid color instead.
How to Do Line Drawings for Glass Painting
It helps to use stencils or a template found online. The best patterns for beginners tend to be those that have thick outlines, like pictures from a coloring book.
These thick lines make it easier for you to trace the image onto the glass, and they leave little room for error.
Of course, if you want to draw your own outlines, it helps to keep to the simplest of lines and shapes. If done right, even these seemingly basic designs can turn your glass painting into a complex work of art.
Whether you use a stencil or draw your own outline, it needs to be printed on paper. If you are painting something round, like a cup or jar, then you will have to trim down your outline so it’s able to fit inside.
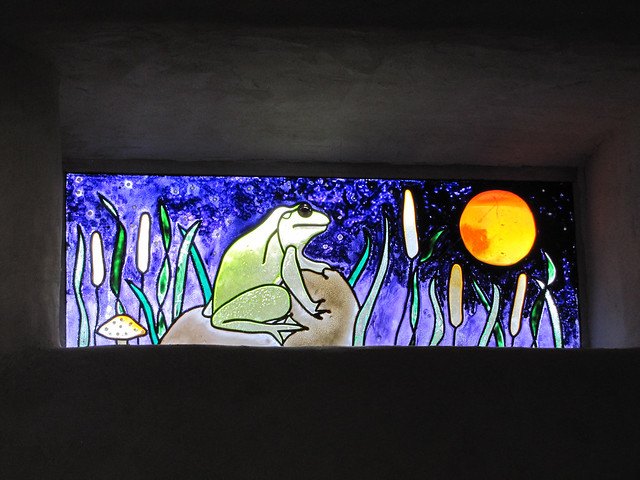
This video has another glass painting project you can try!
Conclusion
Glass paintings are a wonderful way to decorate your home. One of the best things about glass paintings is the sheer number of patterns and methods you can use to create some of your own glass painting art.
With enough time and practice, you are sure to become an expert at this craft in no time!
What are your favorite glass painting designs?


