
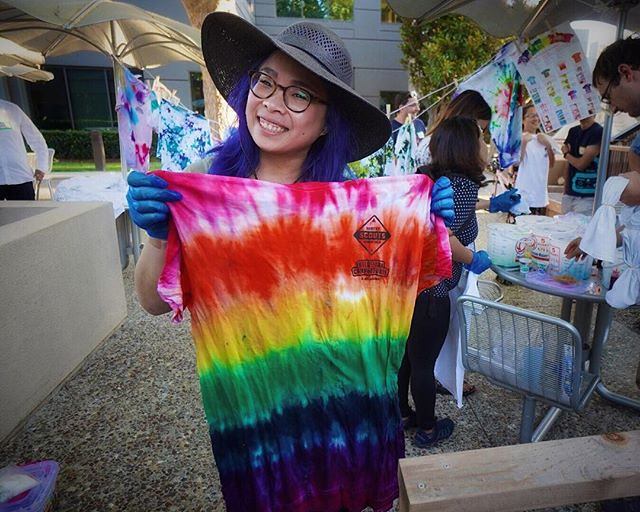
Tie dye shirts are funky, vibrant, and a lot of fun! While they can remind us of hippies from the fifties, they are more than just shirts with rainbow swirls.
You can make stripes, shapes, and doodles using different techniques. With only a few supplies, you’ll have your own tie dyed project in no time!
By Bloomsberries (Creative Commons Attribution-Share Alike 2.0 licence)
Contents
What Is Tie Dye?
The term tie-dye is a technique for coloring fabrics. It refers to any technique where you tie a piece of fabric, after twisting, folding, or crumpling it.
Fabric dye is then applied, often by dipping the fabric directly to a container of dye. Because the fabric is bunched up and folded in places, they absorb color depending on which parts of the fabric were exposed.
Once the fabric is dry and its strings are removed, a pattern will emerge around the folds. Different tie dye techniques, like folding, twisting, and crumpling, can be used to create different patterns.
Due to the nature of the fabric and the dye, no two tie dye patterns will be the same; this makes tie dyes easy, cheap, and unique!
How to Tie Dye
Supplies
Tie dyeing is a fun and easy way to liven up any type of fabric, whether it be clothing or just a decorative piece.
To get you started, you will need four main things: fabric, dye, a tub, and, of course, the tie.
- Fabric
Tie dyes are usually applied to t-shirts, but they can be put on pretty much anything. Scarves, socks, pants, curtains – you name it, you can dye it.
Just make sure that your fabric is at least 60% cotton; most synthetic fibers will not absorb dye color.
- Dye
Dyes can come in either powder or liquid forms. There are many kinds of fabric dye on the market that come in different colors.
Each brand will have its own sets of instructions—sometimes, they may also need additional materials. You can buy dye from grocery stores, craft stores, or online.
- Tub
You will need a tub with a wide opening to hold your dye. Try to aim for a three- to five-gallon-container for one shirt.
Make sure that you’re using a tub that you wouldn’t miss, as the dye is likely to stain it thoroughly.
By Mpeg man (Creative Commons Attribution-Share Alike 2.0 licence)
- Tie
This will be what you use to tie your fabric in place as it dries. Rubber bands, string, and rope can make interesting designs.
Some crafters will swear by rubber bands, but this depends entirely on preference and the pattern that you want to make.
You can successfully tie dye with just these four things, but there are also a few tools that crafters often use when tie-dying.
Here are some optional tools:
- Gloves: Either rubber or latex gloves will work great. If you need to do a soda ash bath, you will need gloves, as soda ash will sting. Fabric dyes won’t sting, but stains will stay on your skin for at least a day.
- Old Clothes: Dye will get on everything, not just your hands! Make sure you’re wearing old clothes, pants, and shoes.
- Plastic Bags: Dyes will stain your workspace as well. If you’re working on a table that you don’t want to stain, covering it with plastic will do the trick.
- Table Napkins: When working with dyes, it’s best to have some table napkins within reach. It’s always a good idea to wipe your hands regularly while working to make sure that you don’t transfer dye from your hand to the fabric.
Procedure
- Prepare Your Fabric
Before starting with your tie dye project, you will need to prepare your shirt, especially if it’s brand new.
Wash them as you normally would, and leave them to drip. Don’t let them dry out completely! You’ll want your fabric damp to let the dye flow more easily.
Some dyes require you to give the fabric a soda ash bath. A soda ash bath will make your dye permanent and stop it from bleeding out when washed.
To do a soda ash bath, mix about a cup of ash to a gallon of warm water, and soak the fabric for about an hour.
After prepping your fabric, proceed to fold, crumple, and tie your shirt as you would like. There are techniques that help you produce patterns, like shapes or stripes.
However, it’s perfectly fine to fold, crumple, and tie your fabric in whatever way you like.
- Mix the Dyes
Mixing will depend on the brand and type of dye you bought; follow the instructions included with the pack.
While it may seem like a good idea to prepare dyes beforehand, dyes lose their vibrancy after about an hour. It’s always best to mix up a new batch every time you’re planning to undertake a project.
- Prep Your Workspace
When tie dyeing, it’s best to work outside whenever possible.
Cover your work area with plastic or newspaper, and make sure that you’re wearing clothes that you don’t mind getting stained.
Prepare your dyeing tub, your ties, and your dyes, and let’s get soaking!
- Dye the Shirt
You could either apply the dyes directly onto the fabric or soak the fabric into the dye. Both techniques create exciting results, so don’t be afraid to experiment!
You can apply dye on the fabric with cups or squeeze bottles; bottles can give you more control, while cups can produce more organic patterns.
On the other hand, soaking can be a great way to apply one solid color. For more colors, dunk portions of your shirt in different tubs with different colored dyes.
- Leave Your Fabric to Absorb Colors
With your fabric still tied up, carefully place it in a sealable bag and keep it properly closed up. Place it in a warm place away from direct sunlight.
Leave it for at least a day to ensure that the colors stay completely bonded with the fabric. You can leave the fabric alone for another day.
The length of time you leave the dyes to ‘prove,’ or bond with the fabric, can also affect your tie dye pattern.
- Unwrap and Wash Your Fabric
You’re almost done! Carefully remove the ties and unfold your fabric. Then, under cold running water, wash the dye out of your fabric.
The water will be much darker than what you see on your fabric; they may also mix to form a color that looks black.
If it looks like there is too much color being washed out from your fabric, don’t worry! All the color your fabric needs will stay intact.
Make sure to keep rinsing until the water runs clear; this may take a lot longer than expected. It’s a good idea to wash your fabric separately at least twice more to ensure that colors don’t bleed and stain other fabrics. Once you’re done, dry your fabric as you normally would.
Congratulations! You now have your new tie dye!
This video shows an example of how to tie dye a shirt using the crumple method.
Easy Tie Dye Patterns
The great thing about tie dye is that you can have a unique masterpiece every time. There are many different ways to fold, crumple, twist, and tie your tie dyed fabrics! Here are some cool tie dye patterns for you to try.
Classic Spiral
This spiral pattern is a common and easy tie dye pattern that most beginners start with. It requires a rod (you can also use a fork, a clothespin, or your hand), and least five rubber bands.
To start, place your rod in the middle of your fabric, and twist so that the fabric forms a swirl around the rod. Then, remove the rod, and place the first tie across the middle of the circle.
Continue to put rubber bands on so that they form an asterisk or a sliced pie. When you’re done, you can dye the fabric!
Bulls Eye Pattern
Another tie dye classic, this pattern looks like a bull’s eye – with a circle in the center of the fabric and concentric rings forming around the circle.
For this pattern, the number of rubber bands you will need is equal to the number of rings you want to make.
To start, find the center of the fabric, and pinch this portion so that it juts out about an inch from the center. Tie this with a rubber band. Then shape the rest of the fabric below this first band, trying not to twist the fabric too much.
Your fabric should now look somewhat like a doll. Then, spaced an inch apart, put the rest of rubber bands underneath the first.
Stripes
This pattern creates lines that are very similar to brush strokes! You can create them horizontally or vertically.
Take a side and fold the fabric like an accordion – no more than two inches in width. Then, Wrap the entire length of the strip with rubber bands about an inch apart.
You can also make diagonal stripes for a more ‘organic’ look—just start from a corner of the fabric instead of the side.
Heart
And, of course, there’s a fold that gives you the shape of a heart! To create this pattern, fold your fabric lengthwise, and draw half a heart along the fold.
Then, starting from the bottom, fold the shirt accordion-style. The lines of the heart should form a straight line along the fold.
.jpg)
By Festival Contato (Creative Commons Attribution-Share Alike 2.0 licence)
Put a rubber band along the line you drew. Then, bunch up the rest of the fabric under this band, and tie it up with bands about an inch apart. Check out the complete tutorial from Crafty Chica.
The area of your heart shape will be from the tip of your fabric to the first band that you tied. Dye this a different color than the dye beside it, and you will have your heart!
Cool Tie Dye Techniques
If you’re looking for even more variety in your patterns, you can break away from the usual folding and tying.
Here are some techniques that are out of the box, and are sure to get you some cool tie dye effects.
Glue Resist
Glue is a great way to add interesting patterns to your fabric and you can even use it with the usual folding and tying technique.
The glue will completely ‘mask’ the dye from the fabric, so that you’re left with whatever color your shirt originally was.
This technique is great for those who want more control over their patterns, or those who like to doodle. Here is a more detailed demo.
Bleach Pen
Like glue, bleach pens can also help you achieve more control over your patterns. Where glue can make clear edges, bleach pens can make fuzzier edges, with color bleeding through where you applied the bleach.
This is a great technique for people who want a more organic look to the glue resist technique.
This video shows another example of a tie dye techniques.
Tie Dye for Kids
Tie dyeing is a great weekend activity for bonding with your kids. It’s cheap, creative, and a lot of fun!
Here are some tips to help get you started tie dyeing with your kiddos.
- Buy a Tie Dyeing Kit
With kids added to the equation, it’s best to stick to kits instead of individual dyes.
Buying individual dyes may save you a bit of money, but kits will make sure that your tie dye weekend is fun and hassle-free.
- Keep It Simple
You may want to try out complicated patterns, but with children around, it’s best to stick to easy tie dye patterns.
This is especially true if it’s your first time doing a tie dye! Don’t worry—even with the simplest pattern, tie dyeing can produce great results and are a lot of fun.
- Keep Them Busy
Make sure your kids are involved with the process. As much as possible, have them do the steps with their own shirts, and give them the freedom to choose their colors and patterns.
Getting them invested is a great way to keep them focused!
Tie dyeing is a fun and rewarding activity for all ages. Hopefully, this has helped you get started on your tie dyeing adventures!
What are your favorite tye dye patterns?


