
As the DIY movement has continued to soar, epoxy resin crafts have seen a major climb in popularity.
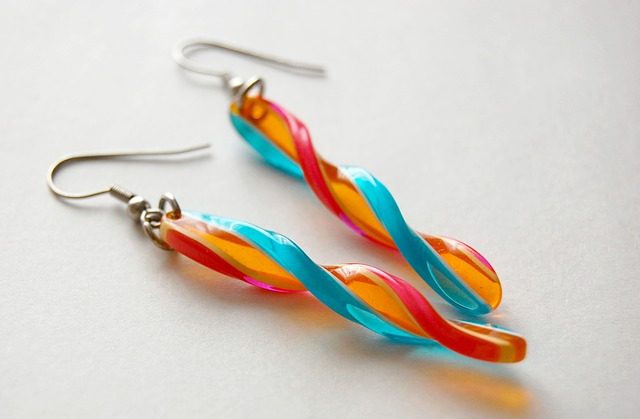
Resin jewelry ideas have taken carnivals and concerts by storm as great ways to personalize a look, while resin projects around the home can make décor look all the more unique.
Interested in learning what to do with resin? Then look no further than this complete guide to resin crafts.
Your epoxy resin projects will reflect your personal interests and be completed in no time at all, so long as you’re careful and open to crafty experimentation. Let’s dive into the good stuff.
Contents
What is Resin?
When you see resin crafts available in your local craft or jewelry store, it’s in a solid yet flexible form. This isn’t the original form of resin, however. So, what is resin made of?
Resin, generally speaking, begins life as a highly viscous type of polymer, or plastic.
It is a composite or artificial blend of organic compounds that can be molded into larger shapes, which can mimic the appearance of other craftable materials.
There are countless different types of resin plastics out in the world already. A garden planter, for example, is made of the same type of component parts as a piece of resin jewelry. Both use polyethylene to maintain their structure and flexibility.
Craft resin is sturdier than most resin products available on the market today, and it’s recently seen an increase in use thanks to Instagram trends and designer exposure.
The Benefits of Crafting With Resin
Why have crafters chosen it above all else? Wouldn’t clay or other materials be easier to use and more available?
Resin crafts have unique qualities that allow them to stand out in a crafting crowd, and to provide a sense of authenticity to whatever project you’re creating.
Here are a few other benefits that make them a good choice.
Hard to Damage
Resin crafts are notoriously hard to damage. Sure, if you craft a piece of jewelry and bend it until it snaps, it’s going to break.
That kind of damage requires intention and significant force, though. If you create a resin gem or necklace piece and drop it by accident, your craft will hold up and come away from the incident unscathed.
Resin, in this way, is highly resistant to scuffing and snapping unless exposed to an intentionally harmful force. Even clay pieces that have been exposed to a kiln and finished are at risk of breaking if you drop them the wrong way.
Resin, then, is a great alternative to other crafting products if you want to make something that’s meant to last.
Maintenance-Free
Resin doesn’t require any upkeep or maintenance after it’s been set and molded.
Compare that to the tools in some jewelry making kits, which need to be oiled and cleaned in order to prevent rusting, or even clay molds, which require a finish upon completion and repainting after significant use.
You can modify your resin crafts however you please, but you won’t need to clean them or repaint them in order to keep a pretty look.
Nature-Resistant
If you’re interested in using resin to craft part of a theater costume, cosplay, or outfit, you’re in luck.
Not only is resin easy to use with the proper mold, but it is resistant to water damage. This is because resin is non-porous when hardened, as well as non-hydroscopic.
Your resin crafts will take on paint easily once they’ve been set, but if you’re wearing resin jewelry out in the rain, you won’t have to worry about your project melting like the Wicked Witch of the West.
As a bonus, there’s also no worry of your resin products discoloring or rusting after long exposure to the outdoors.
Different Types of Resin
With the benefits of resin use out of the way, you can explore the different types of resin that are available.
It’s worth noting that these different types have unique purposes. You should do your research before picking a resin willy-nilly to use for a project.
That said, take a look at the collection below and see if you can determine which resin variation is the best for you.
Polyester or Fiberglass Resin
Fiberglass resin is the cheaper option for crafting, but it’s more frequently used on larger repair or creation projects.
By Ana Belchi (Creative Commons Attribution-Share Alike 2.0 licence)
You can use fiberglass resin to repair cracks in boats, for example, as the resin won’t leak and is water resistant.
This type of resin takes more time to mix together with its activating agent, and it can cure within fifteen minutes to a few hours, depending on the size of your project.
It’s recommended that you play it safe and let your resin cure for as long as possible. You don’t want to start playing with your resin piece and have it fall apart in your hands!
Pros:
- Cheap to purchase.
- Hardens significantly and can be safely buffed.
- Can bond with other polyester pieces.
Cons:
- Noxious smell; you must wear a respirator when working with fiberglass resin.
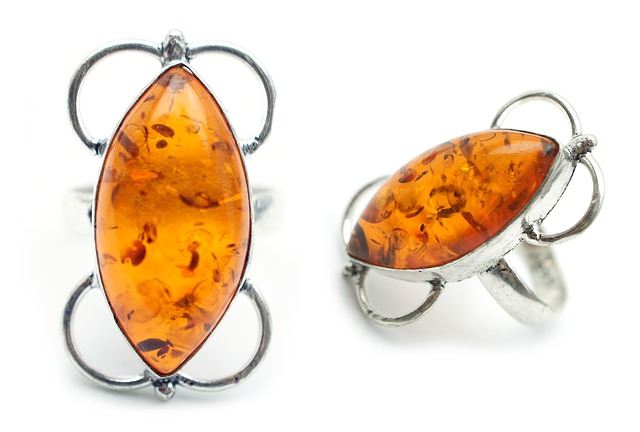
- Will eventually yellow in the sunlight.
- When cured, more fragile than other types of resin.
Epoxy Resin
Epoxy resin is better loved as a crafting material, though it’s more expensive than its fiberglass cousin.
You can find white epoxy resins in just about any craft store, but if you want a clearer variety, you’ll have to pay extra for it.
The cure time on epoxy resin, sadly, is much longer than fiberglass resin. Epoxy resin takes hours or days to cure entirely, and if you remove your project from the mold too soon, it’s possible for it to entirely crumble.
Make sure that the mold you make or buy is especially compatible with epoxy resin, or else you’ll be checking your project three days later and wondering why it’s still as wet as day-one.
Pros:
- Safe to use indoors and without a respirator.
- Best resin for jewelry
- Widely available
Cons:
- Can’t be buffed or sanded
- Requires a resin sealer for a proper finish
Silicone Resin
While epoxy resin is perhaps the best type for creating jewelry, costume parts, and other crafts, silicone resin is ideal for crafting molds.
Do you want to make unique and original soap sculptures? How about baking trays that’ll wow your dinner guests? Silicone resin is your friend.
While it’s rather expensive, there’s no better resin available for mold making. It also cures within hours, as opposed to days. This means you can carry on with mold making and casting in little to no time at all.
However, be sure to never use silicone resin to make your jewelry parts. Use it only for creating the molds for your projects, or else you’ll be sorely disappointed with your results.
Pros:
- Easily accessible.
- Safe to use with gloves; no respirator or professional ventilation required.
Cons:
- Rubbery finish.
- Different brands will vary in their food safety, and some may not be suitable for making cooking molds.
Here’s an example of how to make molds out of silicone resin.
How to Make Resin Jewelry
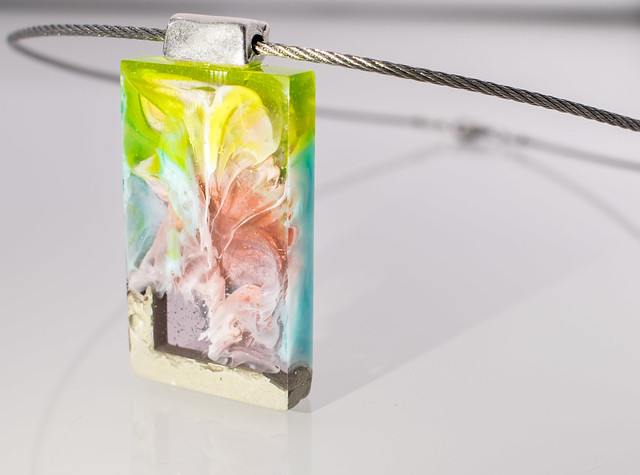
Thanks to its versatility and overall durability, you can develop any range of projects with resin. Anything from jewelry to 3D art to home décor is on the table.
You can also buff up a personal costume or use resin to repair broken materials around your home. Whatever you imagine, resin can help you do.
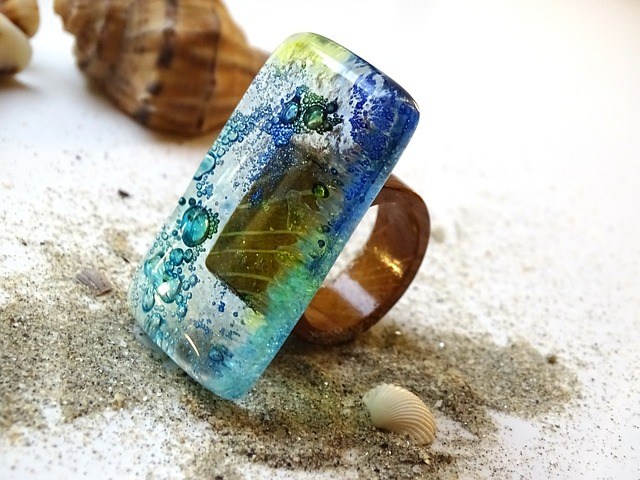
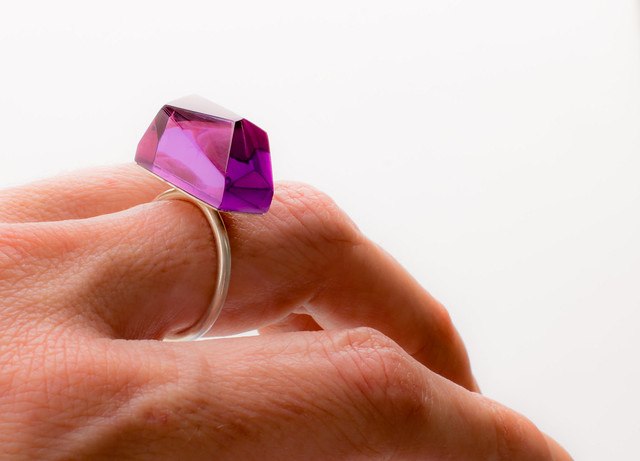
Making resin jewelry is perhaps one of the most beloved uses of resin these days. Whether you want to preserve flowers in a unique ring or create a cameo for a choker, resin will do the trick.
The process of creating your ideal piece of jewelry is generally the same, whatever the project. As such, this basic run-down will show you how to make resin jewelry of any type.
Materials
- A silicone mold, homemade or store-bought.
- Epoxy resin set (comes in two parts: the resin and its hardener).
- Needle nose pliers.
- Glitter, small flowers, or the paint of your choice.
- Glue.
- Disposable cups and spoons.
- Toothpicks, straws, or a lighter.
- Resin sealer.
Step 1: Molding
Before you start working with the resin, you’ll need to choose an appropriate mold. This can be a mold that you create personally with silicone resin, or a mold you buy from your local craft store.
Developing your own resin molds isn’t too complicated, but requires a lot of practice. The first time you try and create something with resin, it’s recommended that you experiment with a pre-made mold.
It’s also worth investing in some mold release, which can be found in crafting stores or online. This will ensure your hardened resin product separates from its mold with ease – no caught edges, no breaking, and no getting stuck with a very nice paperweight.
Before you get started on your project, spray down your mold with this release agent thoroughly.
By Ana Belchi (Creative Commons Attribution-Share Alike 2.0 licence)
Step 2: Mixing
Your epoxy resin kit will come with two bottles of liquid; these will each be necessary to create your resin jewelry.
One of these is standard resin in liquid form. The other is resin hardener. When not exposed to a hardener, resin won’t stiffen and can be kept on a shelf for later use.
Different resin kits have different mixing times and ratios. Look at the instructions on your box to determine how much hardener is needed for your particular brand, as well as how long the combination must be stirred.
After that, measure the amounts out in separate, disposable measuring cups. Then, pour the correct ratios of hardener and resin into one of your disposable cups. Mix together until the batch is no longer streaky.
Step 3: Add Color
If you want to add color to your resin, do so while it’s in your mixing cup – not when it’s in your mold.
There are a number of resin-compatible paints available in your local craft store.
Step 4: Pour
Once your resin mixture has only a few bubbles and appears to be well-combined, you can safely add it to your sprayed-down mold.
If you want to include anything like glitter or flowers, pour half of the mixture into the mold, then add your details. Once everything is properly arranged within the mold, you can pour in the rest of your resin mixture.
Be sure to work quickly during this time. Fast-curing resins can sometimes begin to settle in your disposable cup.
Step 5: Add Detail
If you want to add any stickers or bases to your resin, you can do so after it’s been poured into the mold.
Be sure to set these features gently into the resin mixture or else you may experience some mold overflow.
Step 6: Pop Bubbles
Before your resin has a chance to hold, do what you can to pop all the little bubbles you may see in the mixture.
While a few bubbles won’t compromise your project’s structure, too many can distort its appearance. You can pop these bubbles using a toothpick or by using a straw to blow against the surface of the resin.
Alternatively, take a lighter and gently wave it over the top of your resin project. Do so with great care, in order to avoid setting your mold on fire or burning the resin.
Step 7: Wait
As has been mentioned, the cure time on your resin will vary depending on which kit you brought home. Do what you can to leave your project in its mold for as long as possible, so as to avoid the project crumbling.
Once an appropriate amount of time has passed, de-mold your resin jewelry and seal it.
Step 8: Additional Detailing and Use
While you can’t sand or buff epoxy resin, you can, after removing your project from its mold, add additional paint or details to your work.
When the piece is to your liking, you’re free to incorporate it in other projects or wear it on your person.
This video shows an example of how to make resin jewelry.
And with that, you’ll have started down the path to frequent and professional resin crafting. No matter what project you have in mind, with the right mold and patience, you can see it made beautiful with resin.
Have you tried making your own resin projects?


