
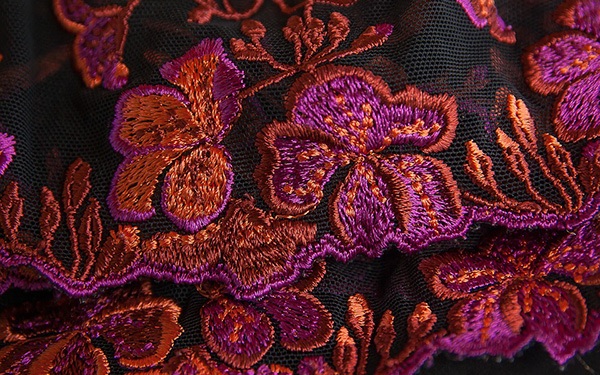
If you’ve ever looked at an intricately embroidered piece of clothing and thought, “I wish I could do that,” then look no further.
Embroidery is fun, has beautiful results, and (best of all) is easy to learn right at home.
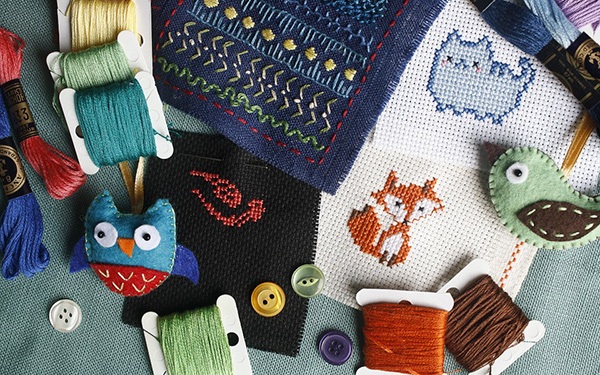
And it’s not just clothes you can use your new skills on. There are lots of embroidery designs for you to work your magic on!
In fact, there’s a range of fun and creative options all the way through the process of learning to embroider. In this article, we’ll go through them with you, along with some other helpful tips and tricks.
Soon, your friends will be looking at your work and wishing they had your custom embroidery skills too…
Let’s take it away.
Contents
What is Embroidery?
At its most basic definition, embroidery just means the process of decorating fabric materials with a needle and some yarn or thread — but there’s lots more to it than that.
For one thing, the art of embroidery has been around for thousands of years, with the earliest record of it being some hand stitching found on articles of clothing from around 3000 BCE.
Since then, it’s been used by cultures across the world with numerous different purposes and techniques. Pretty cool stuff!
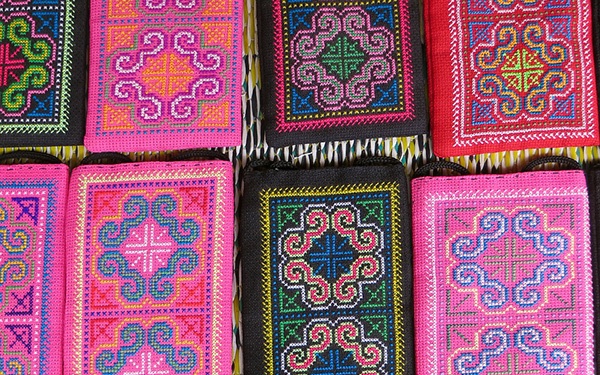
Custom Embroidery
So what can you make with your embroidery skills?
This question is a little tougher. Embroidery is more about embellishing things than creating them, but we promise it’s just as rewarding. Embroidery can give new meaning to an object. An old T-shirt can suddenly display a gorgeous design or your favorite quote, for example.
You can embroider pretty much anything made of fabric.
Even for beginners, there’s a world of choices: shirts, table cloths, napkins, hats, curtains… the list is endless!
Hand Embroidery vs Embroidery Machine
This just might be the biggest question you’ll have to answer while learning the craft.
There are pros and cons either way, and if you end up really liking embroidery, we strongly recommend giving both a try.
For your first project though, you’ll want to make a choice early on, because this will affect what patterns and other materials you need.
Here’s the rundown on both methods:
Hand Embroidery
A lot of crafters prefer to embroider by hand because it leaves more options available to you.
When using a machine, you’re limited to patterns, thread, and fabric that are compatible with it.
With hand embroidery, patterns, size, texture, and types of stitches are all up to you.
A lot of artists feel that it brings them closer to their craft if they can make these decisions on their own, rather than adhering to a user manual.
Plus, there’s a sense of pride and satisfaction when you can set down your work, knowing that you can take credit for every single stitch.
The downside is that this leaves a lot more room for error, which can be frustrating when you’re just getting started.
Hand embroidery is generally a much longer, more meticulous, and often more difficult process. It doesn’t have to be right for everyone.
Using an Embroidery Machine
Machine embroidery is just the opposite: it’s generally quick and simple, but there’s not as much you can do with it and some people are less satisfied when they see the end result, feeling like the machine did the work for them.
Machine embroidery is still an artistic craft, of course and personally we much prefer it to doing it by hand. Unless you have a great deal of time and patience, using an embroidery machine is usually always the better option.
What patterns and thread colors you go with and what objects you put them onto can make all the difference. Having a machine does certainly speed things along and make them easier.
Keep in mind though: an embroidery machine tends to be a big financial commitment, so don’t buy one until you’re sure this is something you want to stick with!
Best Embroidery Machines
While you can visit a dealer to find the best embroidery machines, we suggest you save your time and money and buy one online instead.
While the best machine will vary from project to project and crafter to crafter, there are a number of companies that are celebrated for making only high quality, reliable machines.
For instance, Brother embroidery machines come with a sterling reputation.
Before buying an embroidery machine, you should consider a number of factors that will determine whether it’s the right one for you.
Ask yourself the following questions:
- Is it just an embroidery machine or can it sew as well?
- How good is the lighting on it?
- How large is the embroidery area?
- Does it come with any in-built designs?
- How long is the warranty on it?
- Is it easy to use with beginner friendly features?
With all these factors in mind, here are our picks for the best embroidery machines on the market right now.
Brother PE800 5×7 Inch Embroidery Machine

This is probably the most popular embroidery machine of the moment, and it certainly gets the Craft Schmaft seal of approval.
While it offers great value for money, it is just an embroidery machine with no other sewing capabilities, so bear that in mind before you buy.
Pros
- Excellent quality Brother embroidery machine
- Large 5 x 7″ embroidery hoop
- Color touch LCD screen for you to view and edit your designs on
- Comes with 138 embroidery designs and 11 lettering fonts
- Built-in memory for you to store your own designs
- You can import your own designs via USB or memory card
- Lots of editing capabilities
- Easy to thread and comes with an automatic thread cutter and quick-set bobbin
- Variable speed control
- Stop/start button
- Super bright work area
Cons
- Heavy with a fairly large footprint
- A bit of a learning curve for sewists new to embroidery
![]()
Janome Memory Craft 400E Embroidery Machine

While the Brother above is a well priced and popular machine, the Janome Memory Craft 400E is a premium and very expensive one — reserved for the most committed crafters.
You certainly get a lot of features that can’t be found on cheaper machines — not least the huge 7.9 x 7.9 inch embroidery field.
Pros
- Huge 7.9″ x 7.9″ embroidery field
- Top of the market stitch quality and consistency
- Comes with 160 built-in designs and 6 fonts
- You can import your own designs with the USB drive
- Extra wide table included — it’s great for large projects
- Top loading full rotary hook bobbin
- Sews up to a whopping 860 stitches per minute with variable speed
- Full color LCD screen with on-screen edit functions
- Automatic thread trimming
- Flexible stitch traveling
- Adjustable hoop positioning
- Built-in advanced needle threader — very easy to use
Cons
- Very expensive
- Thread cutter can be tricky to master
- Embroidery only
![]()
Brother SE600 Combination Computerized Sewing and Embroidery Machine

While it may not be of quite the same quality as the super premium embroidery machines above, the SE400 is a very attractive machine and will suit the vast majority of crafters.
It’s cheap, has sewing (and quilting!) capabilities as well, and is of generally very high quality.
Pros
- Very versatile — can sew, quilt and embroider
- Cheap compared to its competitors
- Lightweight and easy to travel with
- Comes with 103 built-in sewing stitches, 80 built-in designs and 6 lettering fonts
- Easy to view, backlit LCD screen
- One touch automatic thread cutting and needle threading
- 25 year limited warranty
- Brightly lit workspace
- Free arm
- Can be connected to a PC to import your designs
- High stitch quality and consistency
Cons
- Embroidery field is quite small (4″ x 4″)
![]()
Embroidery Tools
The Essentials
- Fabric: For beginners, a looser weave, like cotton, is usually best.
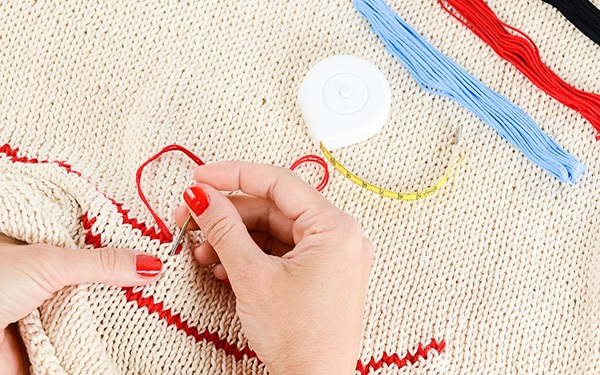
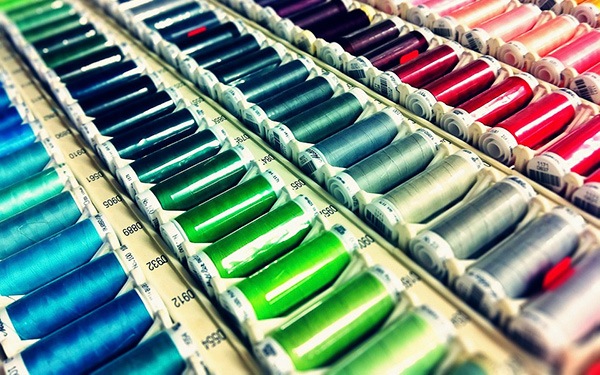
- Embroidery Thread: Most embroidery machines require a thin, polyester thread. For hand embroidery, you have options, but the standard one is a six-strand embroidery floss that should be easy to find at the craft store. You can always separate out strands for smaller, more detailed work.
- Embroidery Needles: Hand embroidery needles have a bigger eye than most sewing needles do, so the embroidery thread can fit through. There are a few different types, so take your thread, fabric, and stitch types into account. If you plan on using a machine, ask the dealer or go online to find out what needle best corresponds with that brand and model.
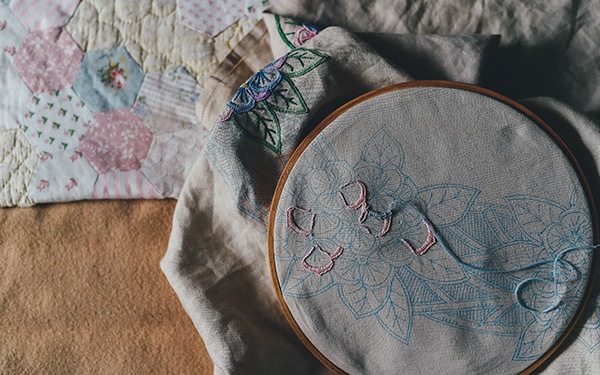
- Embroidery Hoop: This is a wooden or plastic circle (or sometimes oval) that keeps your fabric taut in place while you work on it. Most embroidery machines will include a hoop that attaches to it.
- Stabilizer: This one is only absolutely necessary if you’re using a machine, but it can help a lot with hand embroidery too. It’s a piece of material that goes underneath your fabric and keeps the stitches neat and strong. The stitches go through both layers and you get rid of the stabilizer once your project is complete. You have options here too; some stabilizers are meant to be cut or torn away, some dissolve in water, and there are others to choose from as well. A cut-away stabilizer is generally best for cotton, but be sure to do your research about which one is best for your project, or you could end up damaging it!
Extras
- Water Soluble Pen/Markers: So you can make helpful marks on your fabric and wash them away when you’re done.
- Embroidery Scissors: Smaller and sharper than normal fabric scissors, for snipping those little threads.
- Spray Adhesive: For attaching the stabilizer to your fabric more securely.
How to do Custom Embroidery
Now that you’ve done your research and gathered your materials, it’s time to get into it!
Hand Embroidery
Set-Up
To start out, find a pattern you want to try and transfer it to your fabric.
Many embroiderers choose to draw their own designs onto their fabric with water soluble markers, but you can find iron-on patterns if drawing isn’t your strong suit. Either way, as long as they’re water-soluble, they’ll wash right out when you’re done.
Next, put the fabric into the hoop. You’ll see that the hoop is made up of two circles, and the smaller one should fit neatly inside the other. Put the smaller circle under the fabric – and the stabilizer, if you’re using one – with the design centered on top of it.
Next, put the bigger circle on top of the fabric and press it down so that it fits around the smaller one and the fabric is held between them.
If the larger circle is a bit too tight or too loose, you can adjust it with the screw at the top.
Wetting or trimming the thread can help make it easier to thread through the eye of the needle.
Once you have that done, poke the needle through the underside of the fabric.
Then, it’s just a matter of following the pattern.
There’s a number of stitches you should have in your arsenal. These are easy to learn and tutorials aren’t hard to find. Here are some of the most common ones:
Embroidery Stitches
Running Stitch
The simple up-down stitch that most people think of when they hear “sewing”.
Poke your needle up through the fabric, pull the thread through, and then poke the needle back down through again so that a short stretch of thread stays above the fabric.
Repeat this however many times you want.
This stitch is great for framing your design and can be whatever length you want, but it’s not so good for text or curvier parts of the design.
Take a look at this video for more basic stitches suitable for beginners:
Back Stitch
This is a good stitch for forming text.
Start off the same way you would with a running stitch, but the second time your poke your needle and thread up through the fabric, backtrack and poke it back down through the same hole you made when you finished the first stitch.
This way, the stitches are nice and connected. Poke the needle up again a little further ahead than the end of your second stitch and do the same thing with that one.
Split Stitch
This stitch is good for adding texture and decoration.
Create a short up-down stitch, then poke the needle back up through that stitch, so that the thread of the new stitch splits the thread of the old one in half.
Continue like this in the same direction. This one works best with short stitches all the way through.
Finish
When you’re done, poke the threaded needle down through the fabric so that the knot is on the back side of the project.
Thread the needle through the back side of one of the stitches, rather than the fabric, and instead of pulling the thread all the way through, put the needle through the loop it forms, pull it tight to knot it, and trim the end.
Next, detach the stabilizer, if you used one, take the project out of the hoop, and you’re done!
With an Embroidery Machine
Set-Up
A lot of embroidery machines come pre-loaded with patterns you can use, but if you don’t want to use those, you can use a flash drive to transfer patterns from your computer to the machine.
Just double check that they’re in a file format your machine can work with.
Put the fabric into the hoop, being extra careful to make sure the hoop is centered the way you want it to be.
Most machine hoops will include notches and grids you can use for this, but it also doesn’t hurt to mark where the center should be with a water soluble marker.
When fitting the hoop into the machine, make sure to keep the excess fabric out of the way of the machinery by rolling it up and pinning it in place.
Thread the machine with the color you want and let it do its thing!
Keep an Eye on the Machine
Your work isn’t over once the machine starts stitching.
Stay alert for when it’s time to change out the bobbin for a different thread color.
You should also watch out for places where the machine makes long stitches to cover gaps in the pattern, where there shouldn’t actually be a stitch.
These are called jump stitches and they are easy to snip out, either as they happen or all at once after the stitching is complete.
Finish
You might be tempted to press your project with an iron once it’s done and out of the hoop, but be very careful, since most machine embroidery thread is made of polyester and can be damaged this way.
To finish it off, remove the stabilizer and wash out any marks you made on the fabric.
Your first embroidery project can be slow and meticulous or quick and easy, but either way, it should be fun.
We hope you enjoyed learning the basics of this unique art form and that these pointers help your first project run smoothly!
What’s your favorite way — hand embroidery or using an embroidery machine?


