
You may love cake – because, well, it tastes divine – but cakes can indeed be works of art.
From beautiful fondant sculptures to delicate flowers made of icing, the best cakes are a treat not just for the stomach, but also for the eyes.
Now and then, a new cake decorating trend takes the internet by storm. Consider the mirror glaze cake back in 2016.
This technique was popularized by a Russian baker named Olga Noskova when she posted her mirror glaze cakes on Instagram.
Nonetheless, mirror glazes are proving to be more than just a trend. Even now, bakers worldwide use this elegant and timeless technique.
So, what is a mirror glaze? How can you make one for your cake? Let’s find out.
Contents
What is a Mirror Glaze
Glazes refer to any coating put on food. It can be applied by using a brush, dipping food directly into the glaze, or by dripping the glaze onto the food.
Glazes come in all flavors and colors. Meat glazes are used to coat meat and add a salty, savory flavor. Sugar glazes, like those found on donuts, are a common way of adding toppings on pastries.
Mirror glazes truly took on a life on their own when they were popularized a few years back. Rather than just adding a bit of flavor to a cake, the mirror glaze was the highlight.
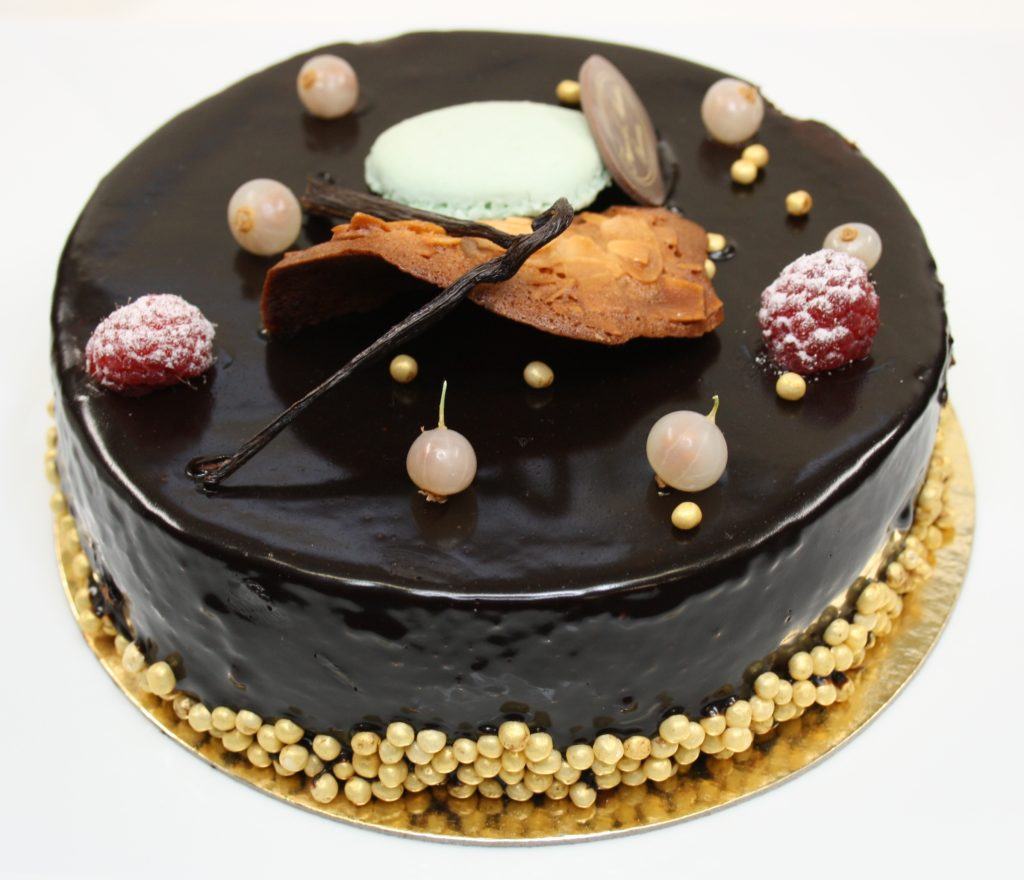
As its name implies, mirror glazes are a topping that is glossy enough to reflect objects. The best mirror glazes are so shiny, they can reflect your own face – adding to the delight of this new technique!
It’s also lovely to watch a baker applying a mirror glaze. The glaze starts as a liquid; when poured on a cake, it can make captivating swirls. But not only is it beautiful – it’s also quick, cheap, and easy to make.
Rather than taking hours to pipe flowers or sculpt fondant, a mirror glaze can be applied in a matter of minutes. You also don’t need to add other toppings; just include a couple of flourishes here and there. Mirror glazes are beautiful enough on their own.
Despite their simplicity and ease, mirror glazes are also versatile; you can mix and match colors to create lovely patterns, but a single color is still breathtaking.
Every glaze is unique, too; because of the way they are applied, no two glazes will be the same.

How to Make a Mirror Glaze Cake
If you want a quick and cheap way to decorate your cake, why not try this mirror glaze cake recipe?
It’s a basic, perfect mirror glaze recipe for beginners. You can tweak it by adding flavors, as well as mixing and matching different colors.
Ingredients
- 1 ½ cups of granulated sugar.
- 2/3 cups of condensed milk.
- 1 cup of water.
- 8 tablespoons of gelatin powder.
- 2 cups of white chocolate.
- Food coloring.
Procedure
- Prepare your chocolate by chopping it into small chunks; alternatively, grate the chocolate so that it melts faster. It doesn’t have to be very fine, but smaller chunks will ensure that your chocolate melts evenly.
- In a bowl, mix a ½ cup of water and the powdered gelatin. Put it aside for a few minutes to let the gelatin bloom.
- In a saucepan, add the sugar, condensed milk, and a ½ cup of water. Heat over medium-low heat, stirring occasionally. When the mixture begins to simmer, remove from the heat. Add in the gelatin and stir until it has dissolved. At this point, your mixture should have slightly thickened.
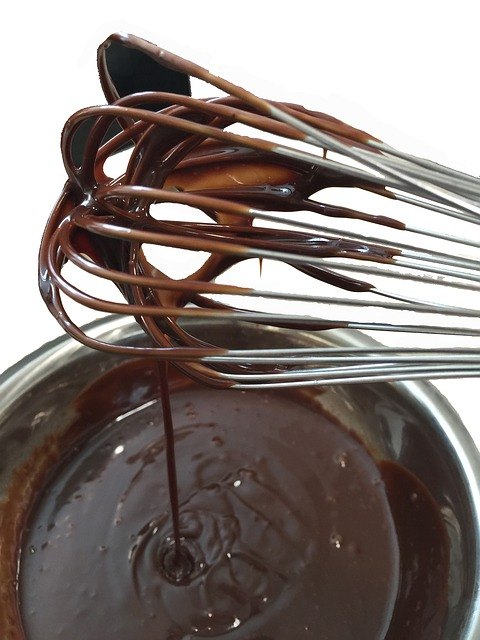
- Pour this mixture onto your chocolate. Whisk the mixture until the chocolate is fully melted.
- Strain the mixture through a strainer to remove any lumps. Add the food coloring. You can mix the food coloring thoroughly for an even hue, or leave some spots uncolored for added effect. For multiple colors, separate the mixture into different bowls and add the food coloring accordingly.
- While the mixture is cooling, prepare your work area. Create a platform so that the rest of the glaze can run off of the cake’s edges. You can do this by balancing a tray or cooling rack on top of cups. Then, put the cake on top of the tray or cooling rack.
Your cake should be at least room temperature; if it is hot, your glaze won’t stick and set.
- At this point, your glaze should be at 90 degrees Fahrenheit. You can test the temperature with a candy thermometer, or check the consistency of the mixture with a spoon. It should be slightly thick, while still able to run over the entire cake.
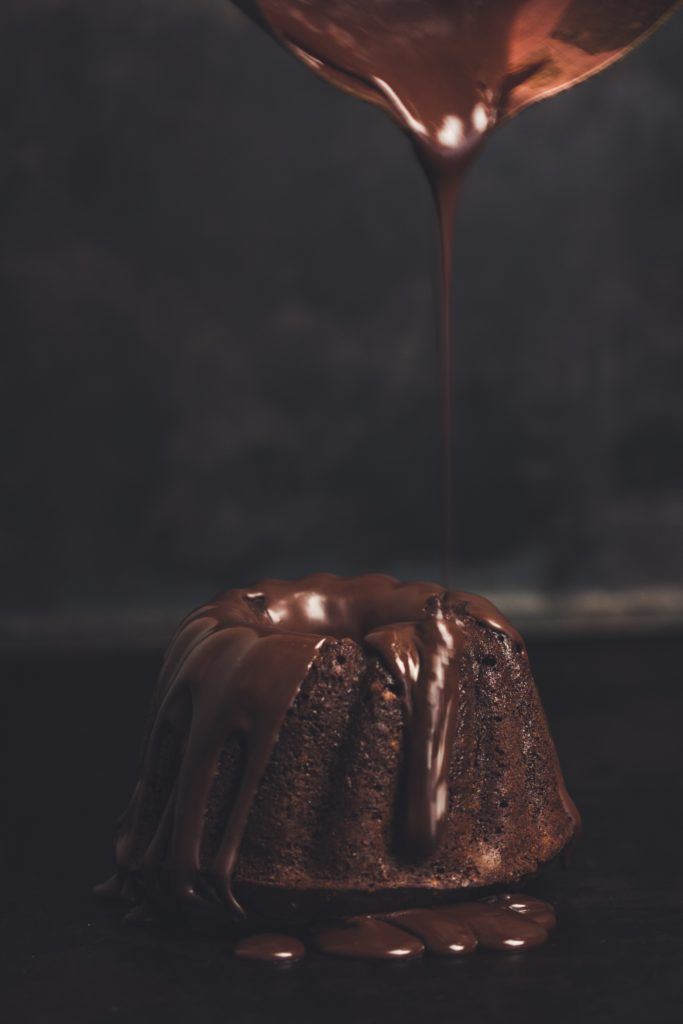
- Now it’s time to pour! For round cakes, pour from the center. Square or rectangle cakes may need pouring from multiple points. You can help the glaze run by tipping the cake slightly. Make sure not to touch the glaze—treat it like nail polish! If you do, however, just add more glaze to cover the spot. Make sure that all spots are covered.
- After pouring, let it sit for a few minutes. Then, clean up the sides of the cake with a heated knife. You can use a torch directly on the knife to heat it or dip your knife in hot water.
- Refrigerate the cake for at least an hour to let it set.
Flavored Mirror Glazes
Unlike fondant, you can easily make your glaze taste wonderful. All you need is to add flavoring to your glaze mix before pouring it on top of the cake.
It’s common to add a dash of vanilla to the glaze, but you can experiment with other flavors, like strawberry.
When you feel confident enough with the traditional white chocolate glaze, you can mix it up. Other mirror glazes to try are the salted caramel mirror glaze, as well as the dark chocolate mirror glaze.
Galaxy Mirror Glaze
The galaxy mirror glaze is a common technique that highlights the best aspects of this design.
Since you can mix different colors, create interesting swirl patterns, and have a shiny, glossy sheen, a mirror glaze is perfect for making galaxy-inspired designs.
For those who want to go the extra mile, you can even add food-safe glitter or dust. If you can find silver, star-shaped sprinkles, all the better!
If you’re throwing a space-themed party, this cake topping is a perfect choice. This recipe uses a small mousse cake, though you can easily tweak the colors or the cake to suit your needs.
Ingredients
- 6 packs of gelatin.
- 1 cup of lukewarm water.
- 2 1/3 cups of sugar.
- A ¾ cup of light corn syrup.
- 1 cup of condensed milk.
- 1 teaspoon of vanilla.
- ½ teaspoon of salt.
- 4 cups of white chocolate chips.
- Gel food colors: black, blue magenta, and turquoise.
- Silver dust (optional).
Procedure
- Bloom the gelatin by adding gelatin powder to a bowl with lukewarm water. Leave for a few minutes.
- Combine the sugar and corn syrup in a heavy saucepan and heat at a medium temperature until dissolved. Whisk in sweetened condensed milk, vanilla, and salt.
- Pour this mixture over the white chocolate chips. Let the chips melt for about three minutes. Once melted, whisk this mixture until it is smooth and creamy.
- Strain the mixture to avoid any lumps when pouring.
- Pour half of this mixture into a separate bowl. Add blue and black food coloring. Whisk thoroughly. Mix this color wisely; it will be the base of your glaze and will be the most predominant color.
- Divide the uncolored mixture into three bowls. In one bowl, add turquoise. In another bowl, combine magenta. Keep the third bowl white.
- Prepare your work area by covering a baking sheet with parchment paper. Place a bowl or glasses of equal height under the baking sheet, and place the cake on top.
- Slowly pour the black and blue mixture over the entire cake, starting from the center and moving to the edges in a circular motion.
- Using a spoon, drizzle the rest of the colors on top of the cake. You can do this slowly to map out where the colors should go.
- At this point, you can add edible dust or glitter on top of the cake.
- Let the glaze set for a few minutes. Then, scrape the excess glaze off with a knife.
- Place your cake in the fridge for a couple of hours to let the glaze fully set.
Glazes that are predominantly black create a more realistic-looking galaxy, while also appearing more formal and elegant.
Brighter glazes, on the other hand, look more fun and bubbly. Just make sure to create a larger batch of color for your topping’s base.
This base will ensure your whole cake is adequately covered, while bringing the rest of the colors together.
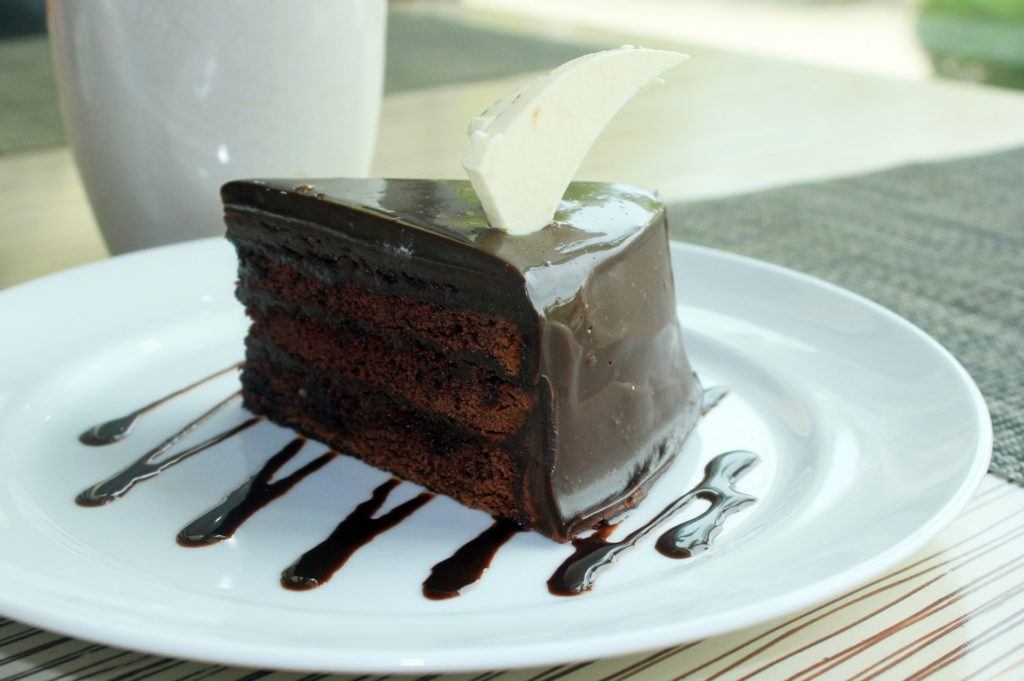
This video shows an example of a chocolate mirror glaze cake.
Galaxy Mirror Glaze Cake Ideas
Cake Pop Galaxy-Themed Cake
Your space-inspired cake can be just as unique as the galaxies. There are many ways to spice up a galaxy mirror cake recipe simply by adding a few fun ingredients into the mix.
For example, try incorporating the theme into the cake itself! This cake by Also The Crumbs Please is made by creating cake pops that look like planets.
The cake pops are then hidden inside the batter so that you can uncover planets when you cut into your cake! Make it fun inside and out!
Summer Galaxy Mirror Glaze
This recipe from Southern Fatty uses a galaxy mirror glaze with predominantly bright colors. The vibrant turquoise creates a fun, summer look, and is perfect for those who want a brighter galaxy cake finish.
Garnished with slices of different fruits, you can have a fresh and cool vibe to your treat.
Whimsical Galaxy Glaze
If a summer vibe is not for you, why not make it dainty? These cakes from Sugar Hero are small mousse cakes topped with a whimsical galaxy mirror glaze.
Using star-shaped sprinkles, these cakes are perfect for anyone with a fondness for space.
Metallic Galaxies
If you really want to go the spacey route, this recipe from Sugar Geek Show takes the galaxy theme to a whole new level.
Using a clever mixture of metallic gold dust and Everclear, this cake is sure to take everyone’s breath away. Paired with the right colors, your guests will be hesitant to take a slice out of this artwork.
Tips and Tricks for Mirror Glaze
Use Very Smooth Cakes
The most common problem bakers encounter when using mirror glazes is an uneven layer of glaze. However, the issue isn’t typically with the glaze, but the cake itself – specifically, the surface of the cake.
To avoid an uneven glaze, try to make your cake as smooth as possible. For beginners, it’s best to use a frozen mousse cake to achieve the best surface.
For those who prefer sponge cakes, try covering deep bumps in the cake with buttercream.
Use the Right Chocolate
To further ensure a smooth, glossy finish, use high-quality white chocolate chips. These should have at least 30% cocoa butter.
This will also help your glaze travel across your cake, so that you don’t get any weird bumps and lumps.
Check the Temperature
If you really need that smooth finish, try measuring the temperature of your glaze. The ideal pouring temperature is 90 degrees Fahrenheit.
If your glaze is too warm, it won’t stick to the surface of your cake; a glaze too cold won’t travel over the cake’s surface and will form lumps. Measure your mixture with a candy thermometer.
Watch the Time
If you’re baking a cake for an event or a client, note that mirror glazes lose their glossiness after 24 hours.
When creating mirror cakes, try to pour the glaze on the same day as the event – or a few hours beforehand, if possible.
This video shows how to make a galaxy mirror glaze cake.
All in All
Beautiful, creative, and tasty, mirror glazes can spice up any cake.
Though they’re tricky for the complete beginner, with enough practice, you too can enjoy this stunning decoration!
Have you tried making a mirror glaze cake?


